Ever wondered how to bring the magic of automation and personalisation into your company's employee recognition process? Imagine this: an employee completes a task significantly contributing to a project. Their manager, wanting to give them immediate recognition, enters a few details into a SharePoint list - the employee's name, the reward description, the gift amount, the award date, and the awarding person's name.
A personalised "congratulations" card is auto-generated in mere moments, featuring all the details in a beautifully designed layout. This digital card then lands straight into the employee's inbox and simultaneously appears in your company's Microsoft Teams channel, catching the whole team's attention. The employee feels appreciated, the team gets motivated, and all this without anyone having to design or send out a card manually.
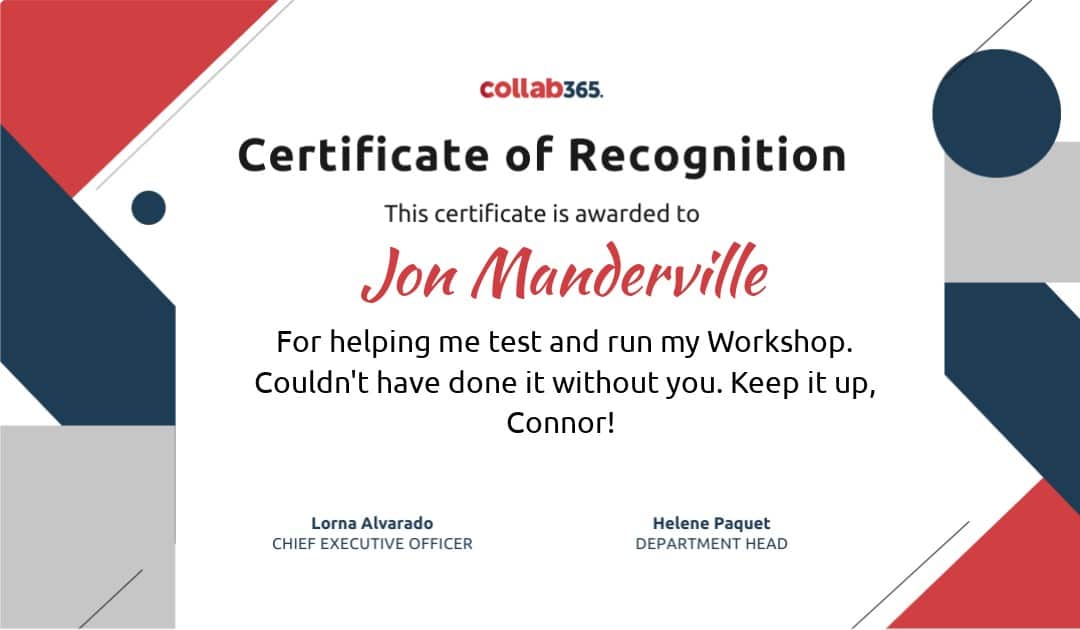
employee recognition card
Sounds like a distant dream? Buckle up because we're about to make this a reality. In this step-by-step tutorial, we're leveraging the power of SharePoint, RenderForm, Make.com, and Microsoft Teams to create an automated, seamless and engaging recognition process. Get ready for a journey through the fascinating world of automation that will make you exclaim, "Wow, that's cool!"
This tutorial will walk you through how to use SharePoint List, RenderForm, Make.com, and Microsoft Teams to automate creating and distributing personalised digital "employee recognition congratulations cards". These cards will include details like "Employee Name", "Reward Description", and "Date Awarded". (You can add as many as you like!)
Setting Up Your Tools
Before we begin, ensure you have accounts set up for SharePoint, RenderForm, Make.com, and Microsoft Teams. If you don't have these, please create them now. All platforms offer free versions or trials sufficient for this tutorial.
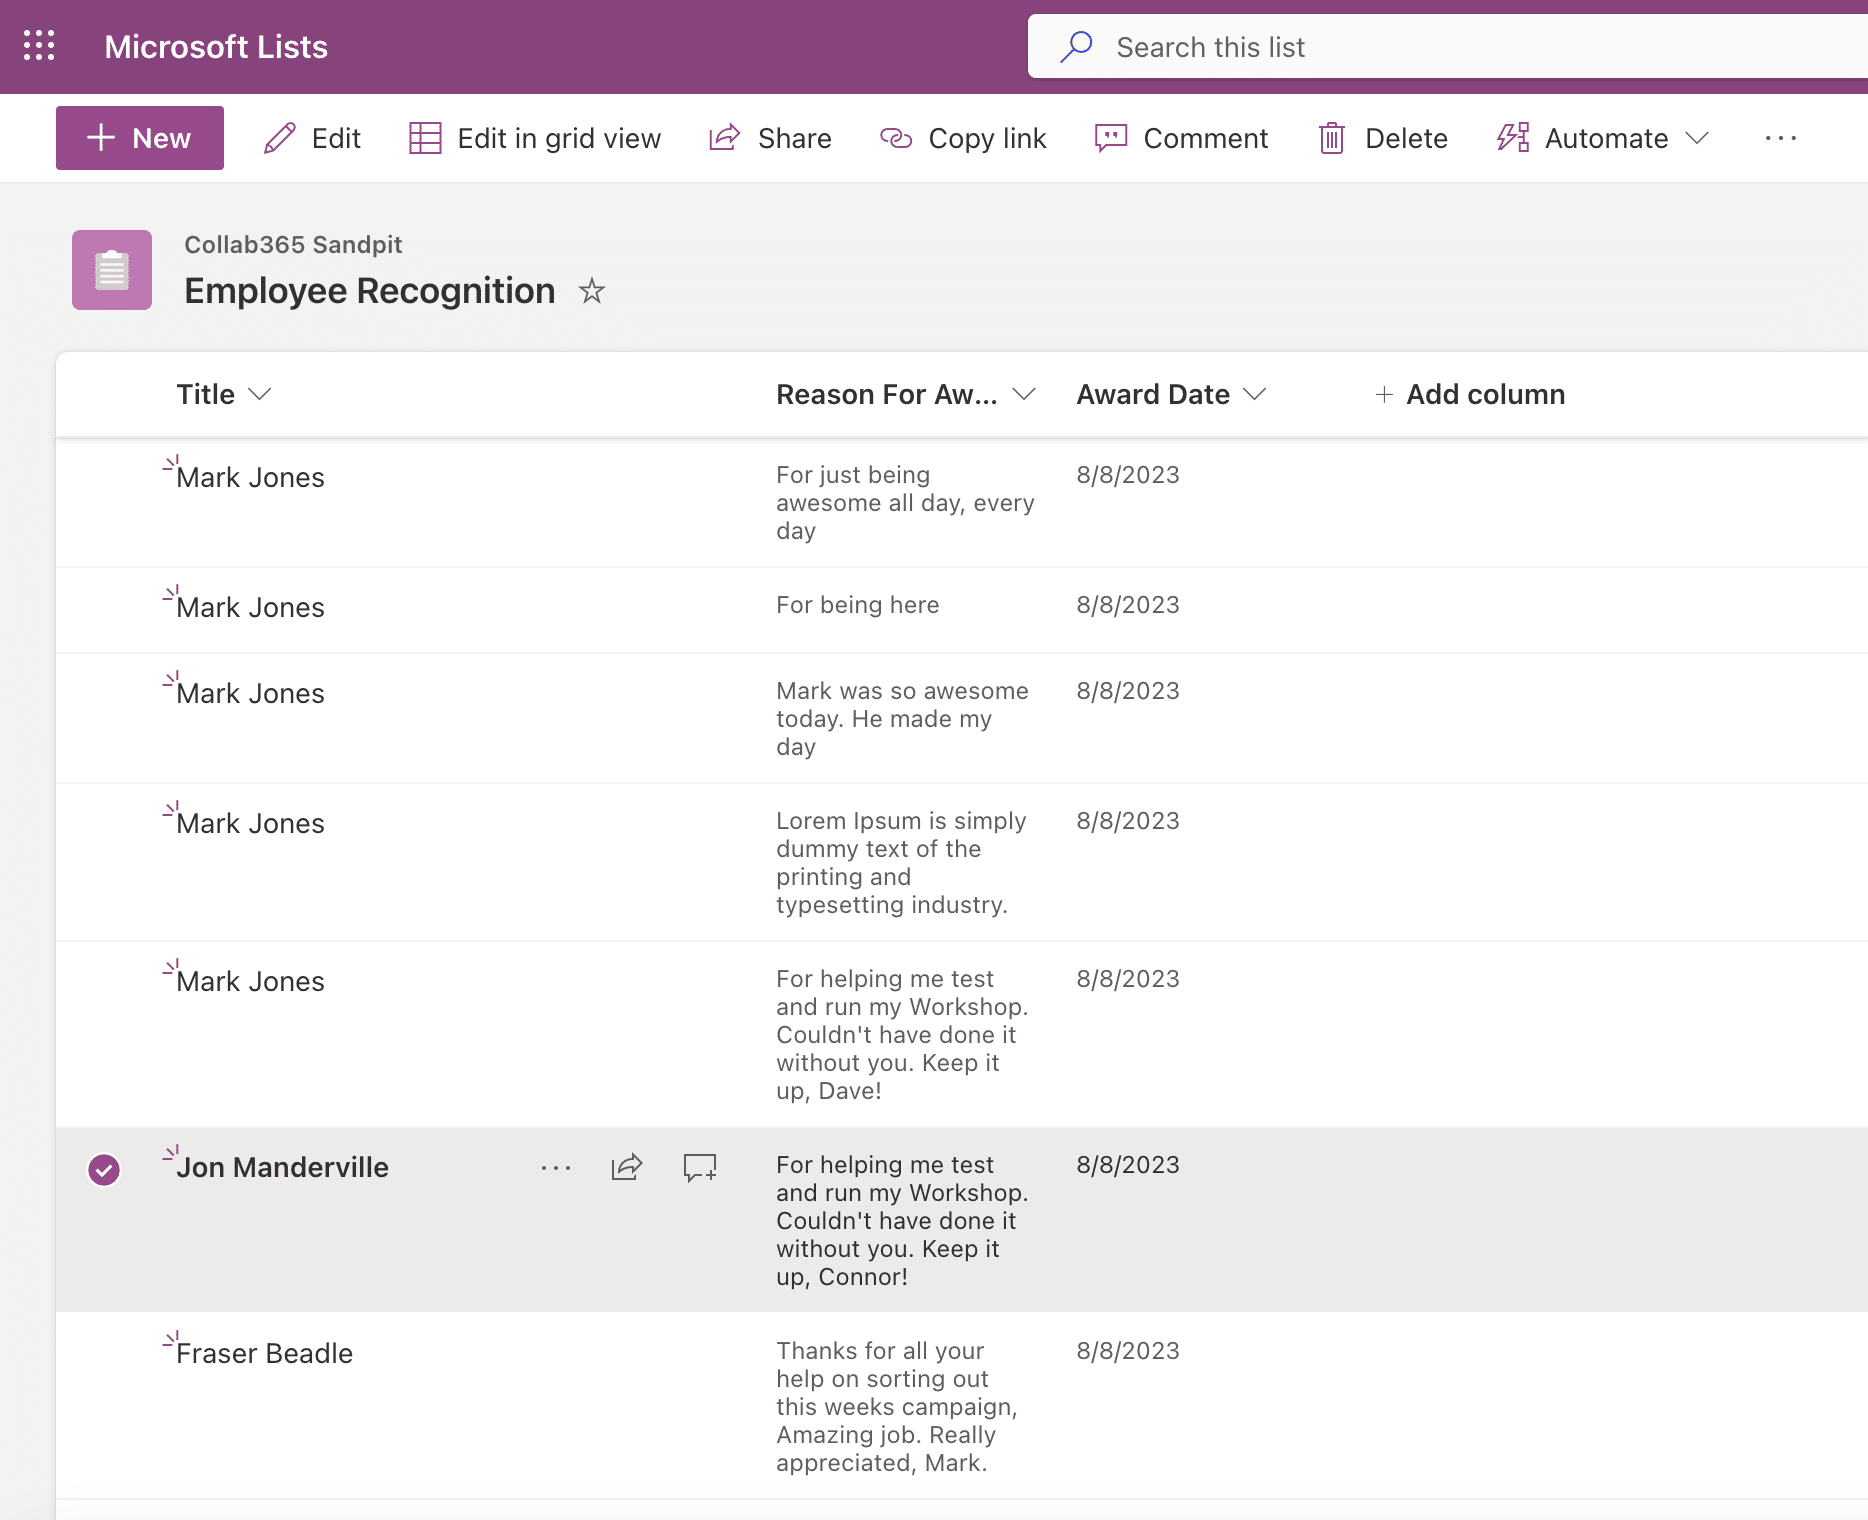
Employee Recognition SharePoint List
Creating a SharePoint List for Recognition Data
As we did in our previous tutorial, the first step is creating a custom SharePoint list to hold the recognition data. Here's how:
- Log in to your SharePoint site and click on 'Lists' in the left sidebar.
- Click 'New', and select 'Microsoft List'.
- Name your list something like "Employee Recognition".
- Add the following text columns:
- Title (already exists and will be the employees name)
- Reason for award
- Date Awarded (default to today's date)
In this list, "Title", "Reason for Reward" and "Date Awarded" will be entered by the HR or team lead. The "Image URL" will link to the newly generated recognition certificate (returned from RenderForm).
Note, In a real-world example you'd probably want to add extra columns such as "awardee name", and email address of the employee (so that you can also email them their certificate).
Building a Template in RenderForm
RenderForm is a tool that allows you to generate dynamic images from templates. For this tutorial, we will create a template for our recognition card.
- Create a free account with RenderForm.com and log in.
- In the Editor, design your recognition card template. For this, you might want to include:
- A background image that looks like a certificate. In my example I used Canva as there are a lot to choose from. Make sure you leave enough space to add the dynamic text onto.
- Text boxes for "Employee Name" and "Reward Description". (Feel free to add as many as you need but be sure to also create them as SharePoint columns and pass them into the template).
- Consider including your company logo for a more personalised touch.
Remember, each of these elements will be dynamically replaced with data from the SharePoint List. Once you are happy with your new recognition card template, save it and remember its name.
Now, you're all set with your RenderForm template.
This is what my Canva image looks like after I exported it.
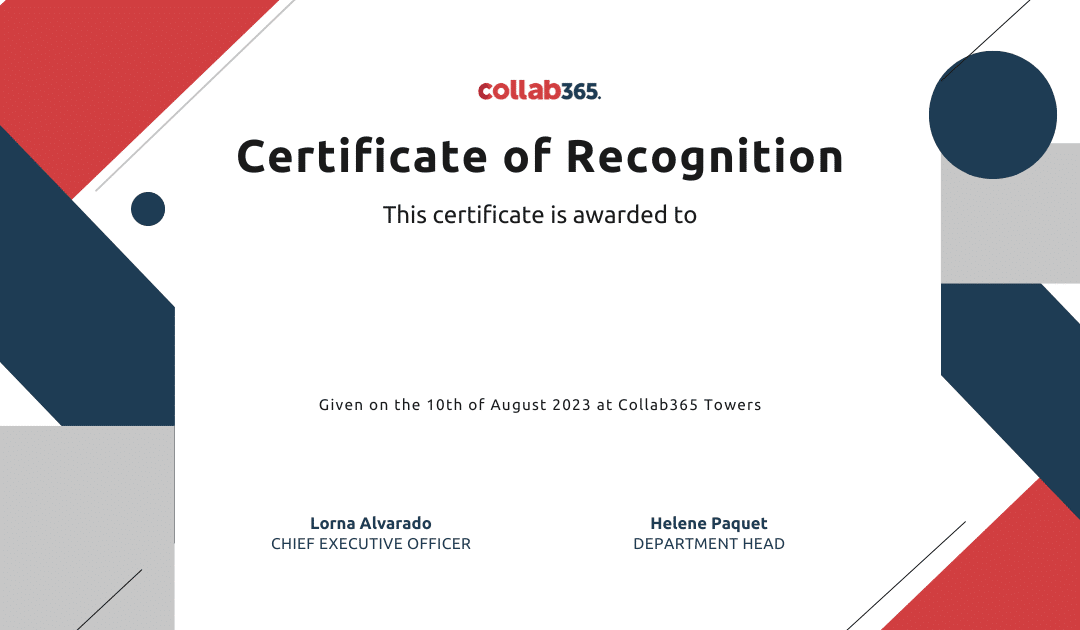
certificate employee
This is a screenshot of my finished template in RenderForm. I added my Canva image to the background and then dropped 2 text boxes on the canvas (one for "reason" and one for the "employee_name":
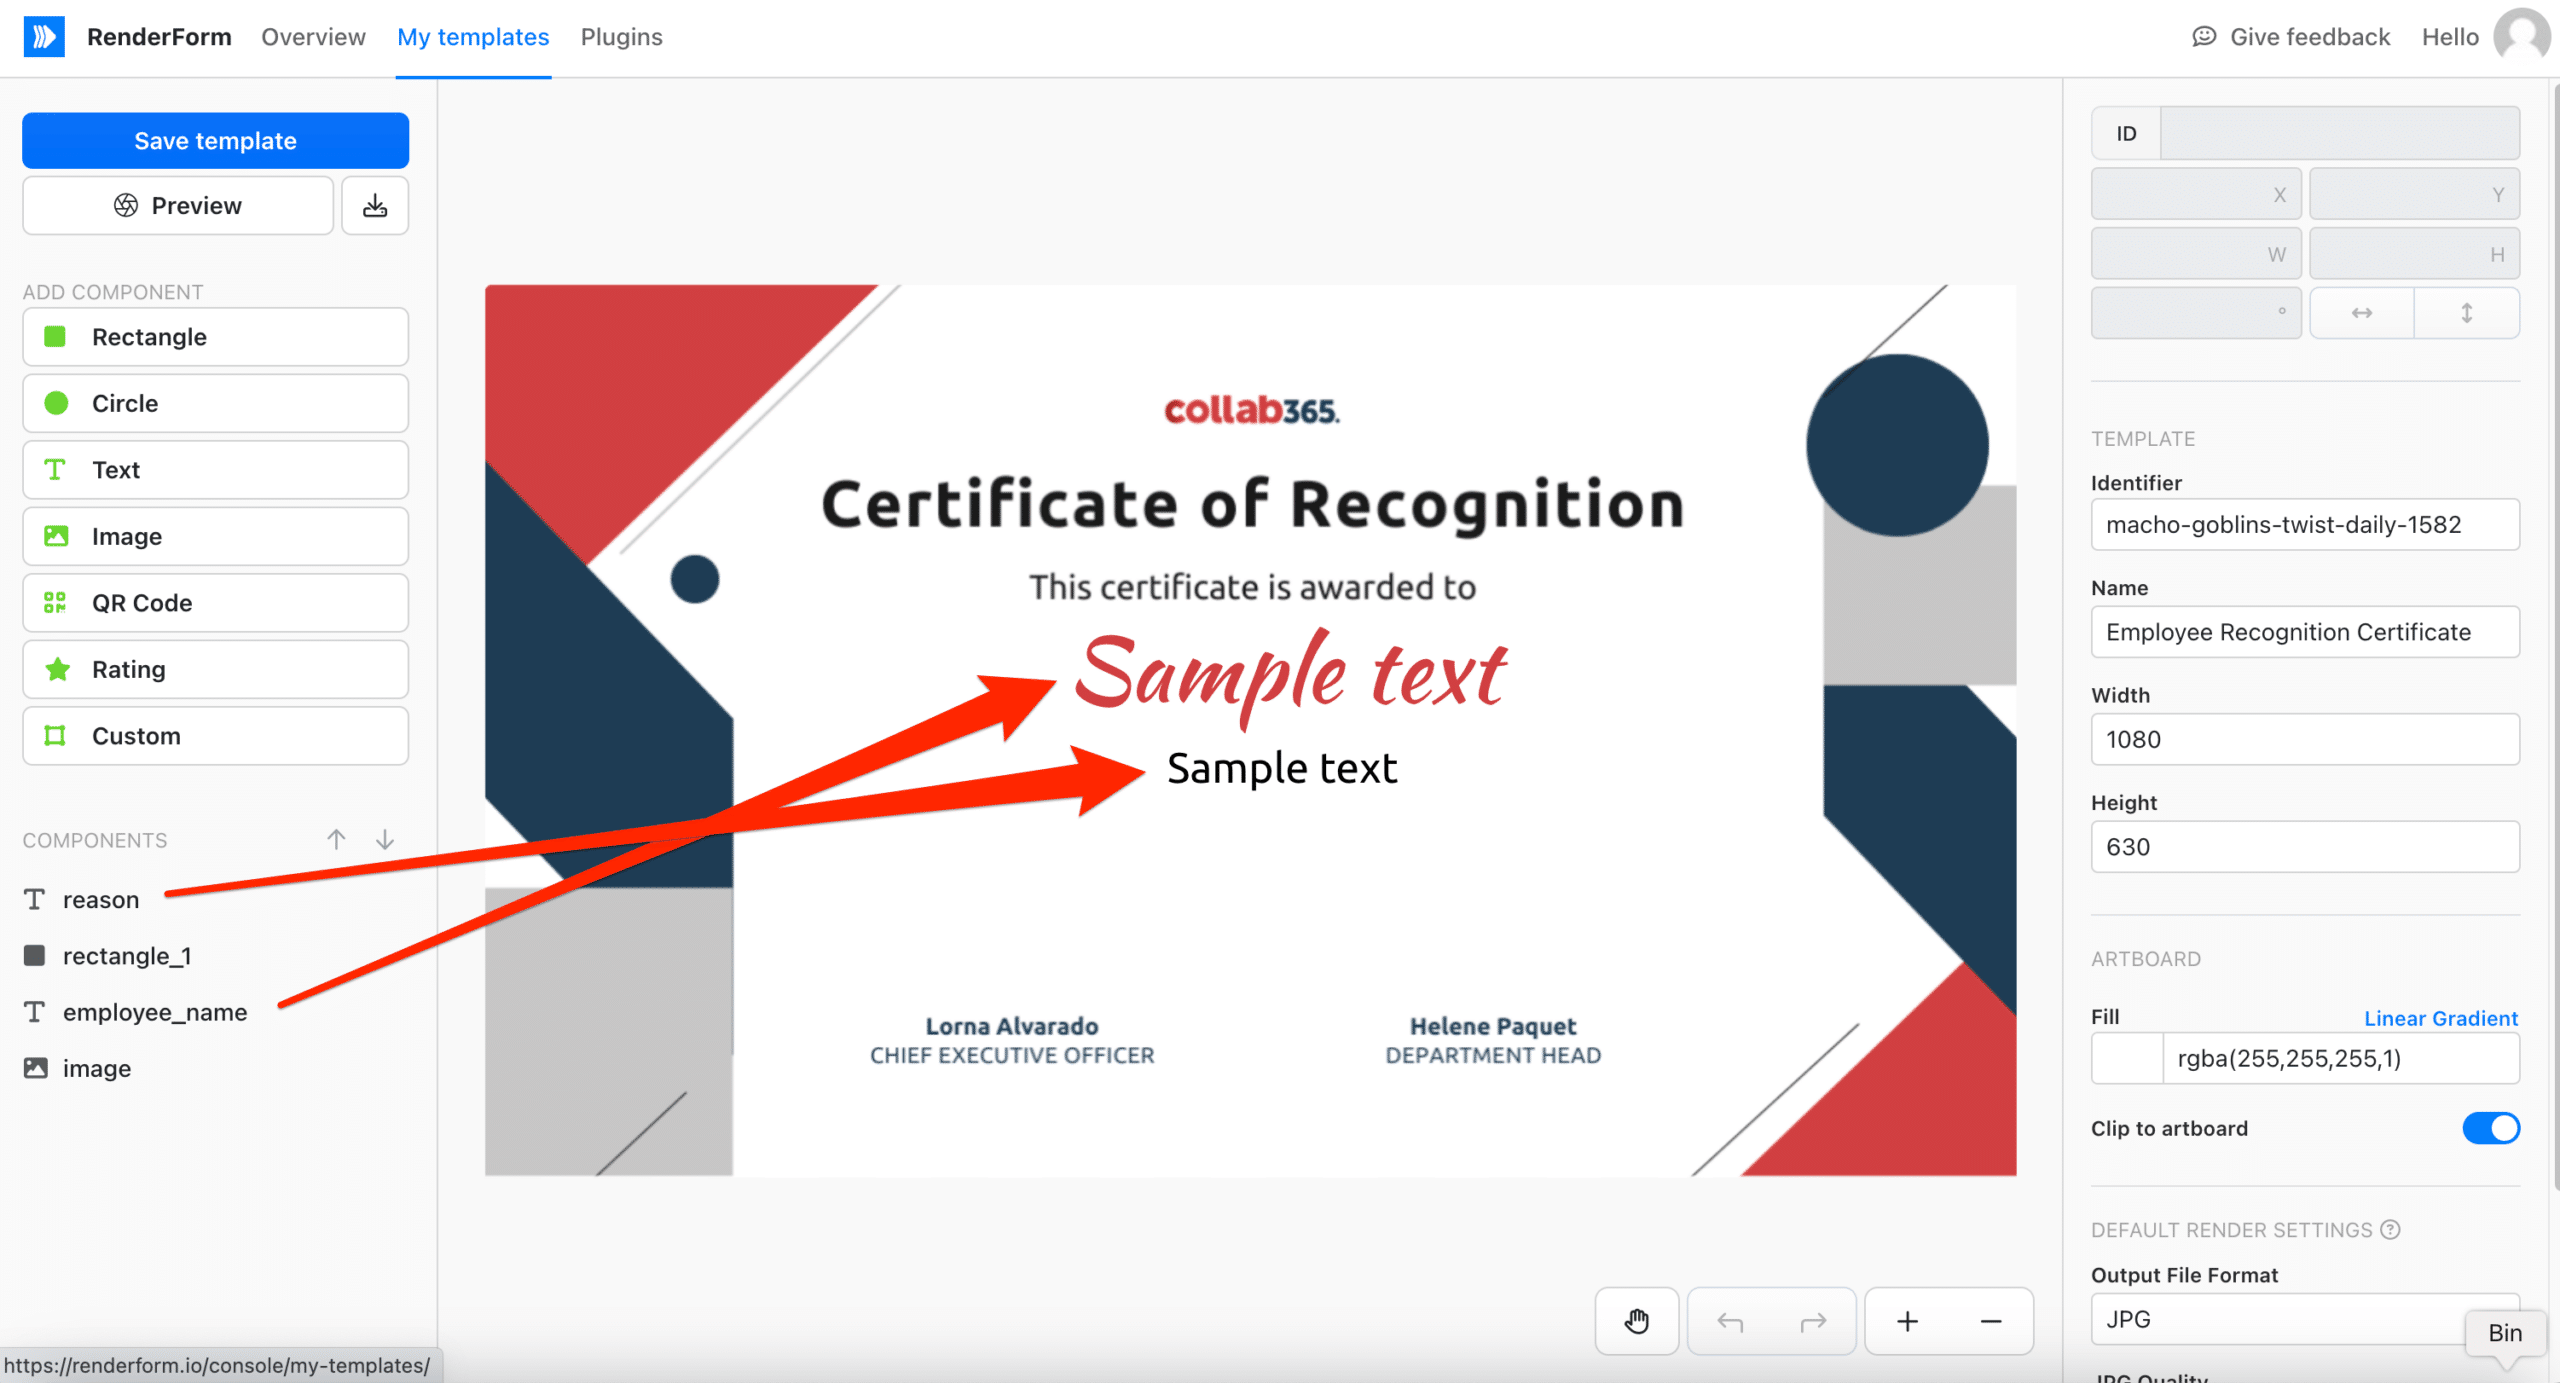
certification of recognition in renderform
Creating the Scenario in Make.com
While SharePoint and RenderForm aren't directly integrated, we can connect them using Make.com. Let's create a new 'Scenario' to automate image generation whenever a new list item is added in SharePoint.
1. Create a free account and log in to Make.com, click 'Scenarios' and choose 'Create a new scenario'.
2. On the Scenario canvas, click '+' and find the 'SharePoint Online' module. Choose 'Watch Items'.
- Follow the instructions to create a new connection to your tenant if this is your first time.
- Use the 'ID Finder' to locate your Site ID where you created your list in SharePoint.
- Once you've added your site, select your 'Employee Recognition' list.
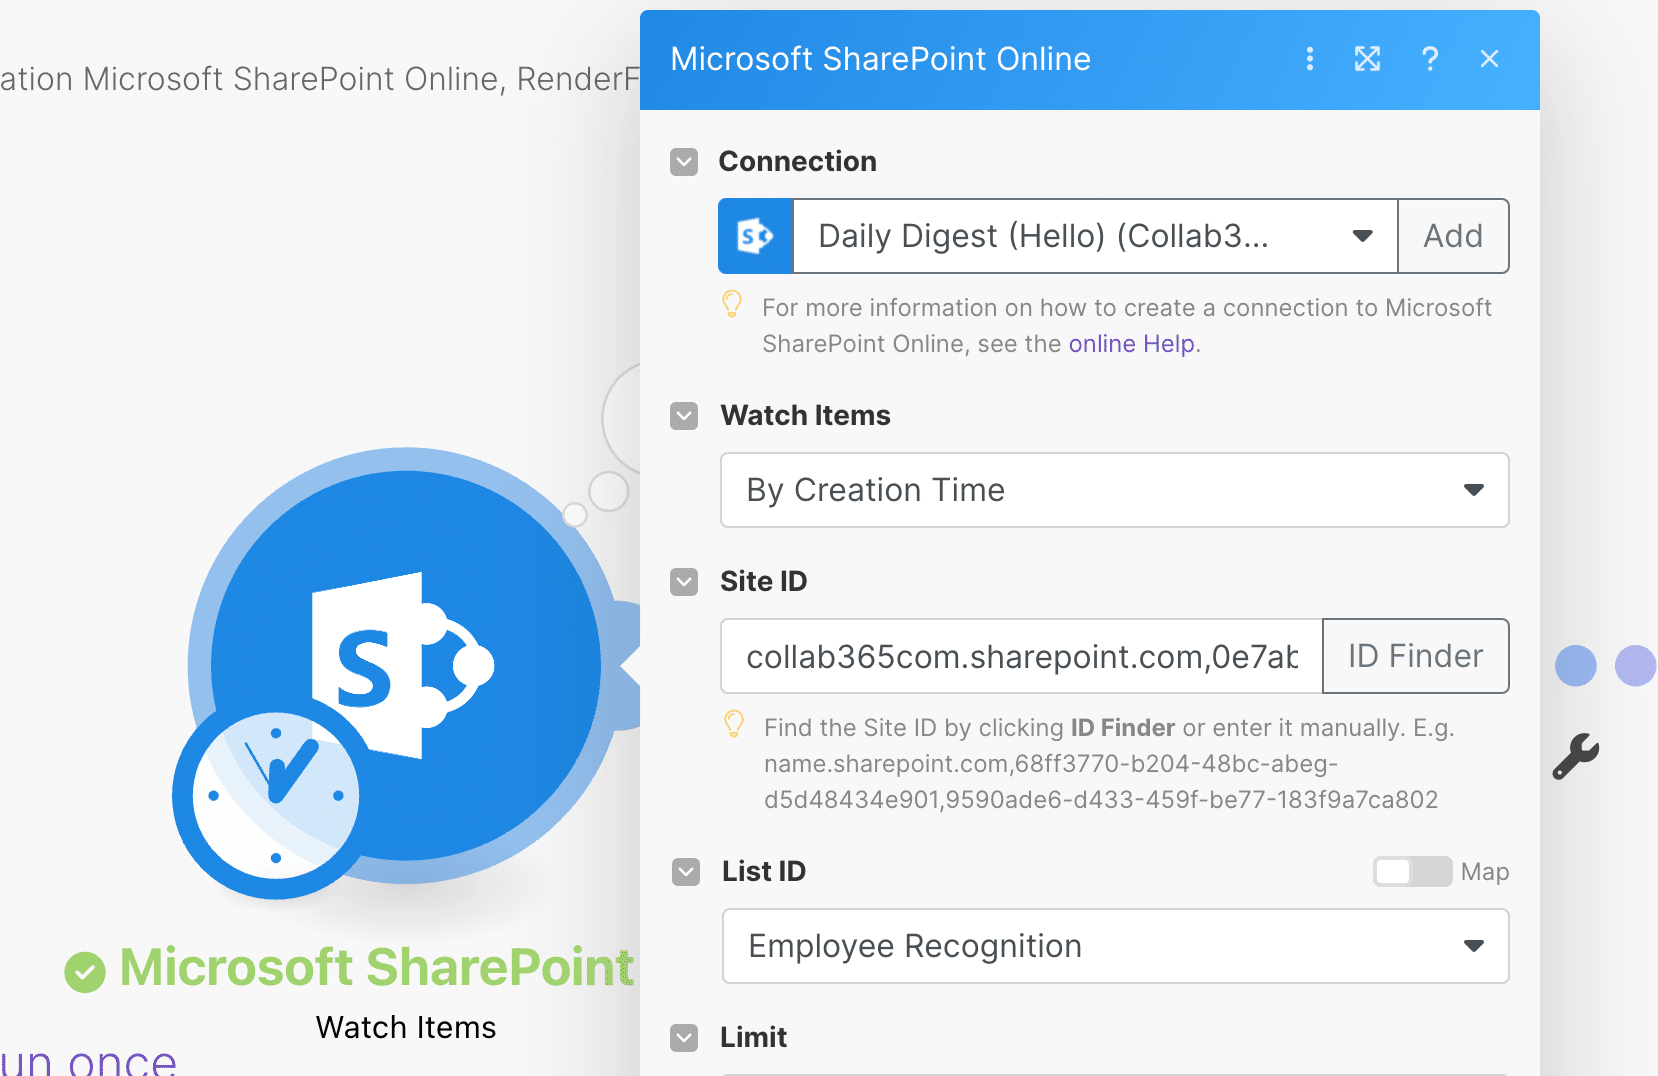
sharepoint list in make
Now add a RenderForm module and choose 'Render an image'.
- Connect to your RenderForm account using your API key (available in your RenderForm account).
- Configure it to map list columns to template elements, generate the image, and output the image URL to the SharePoint list.
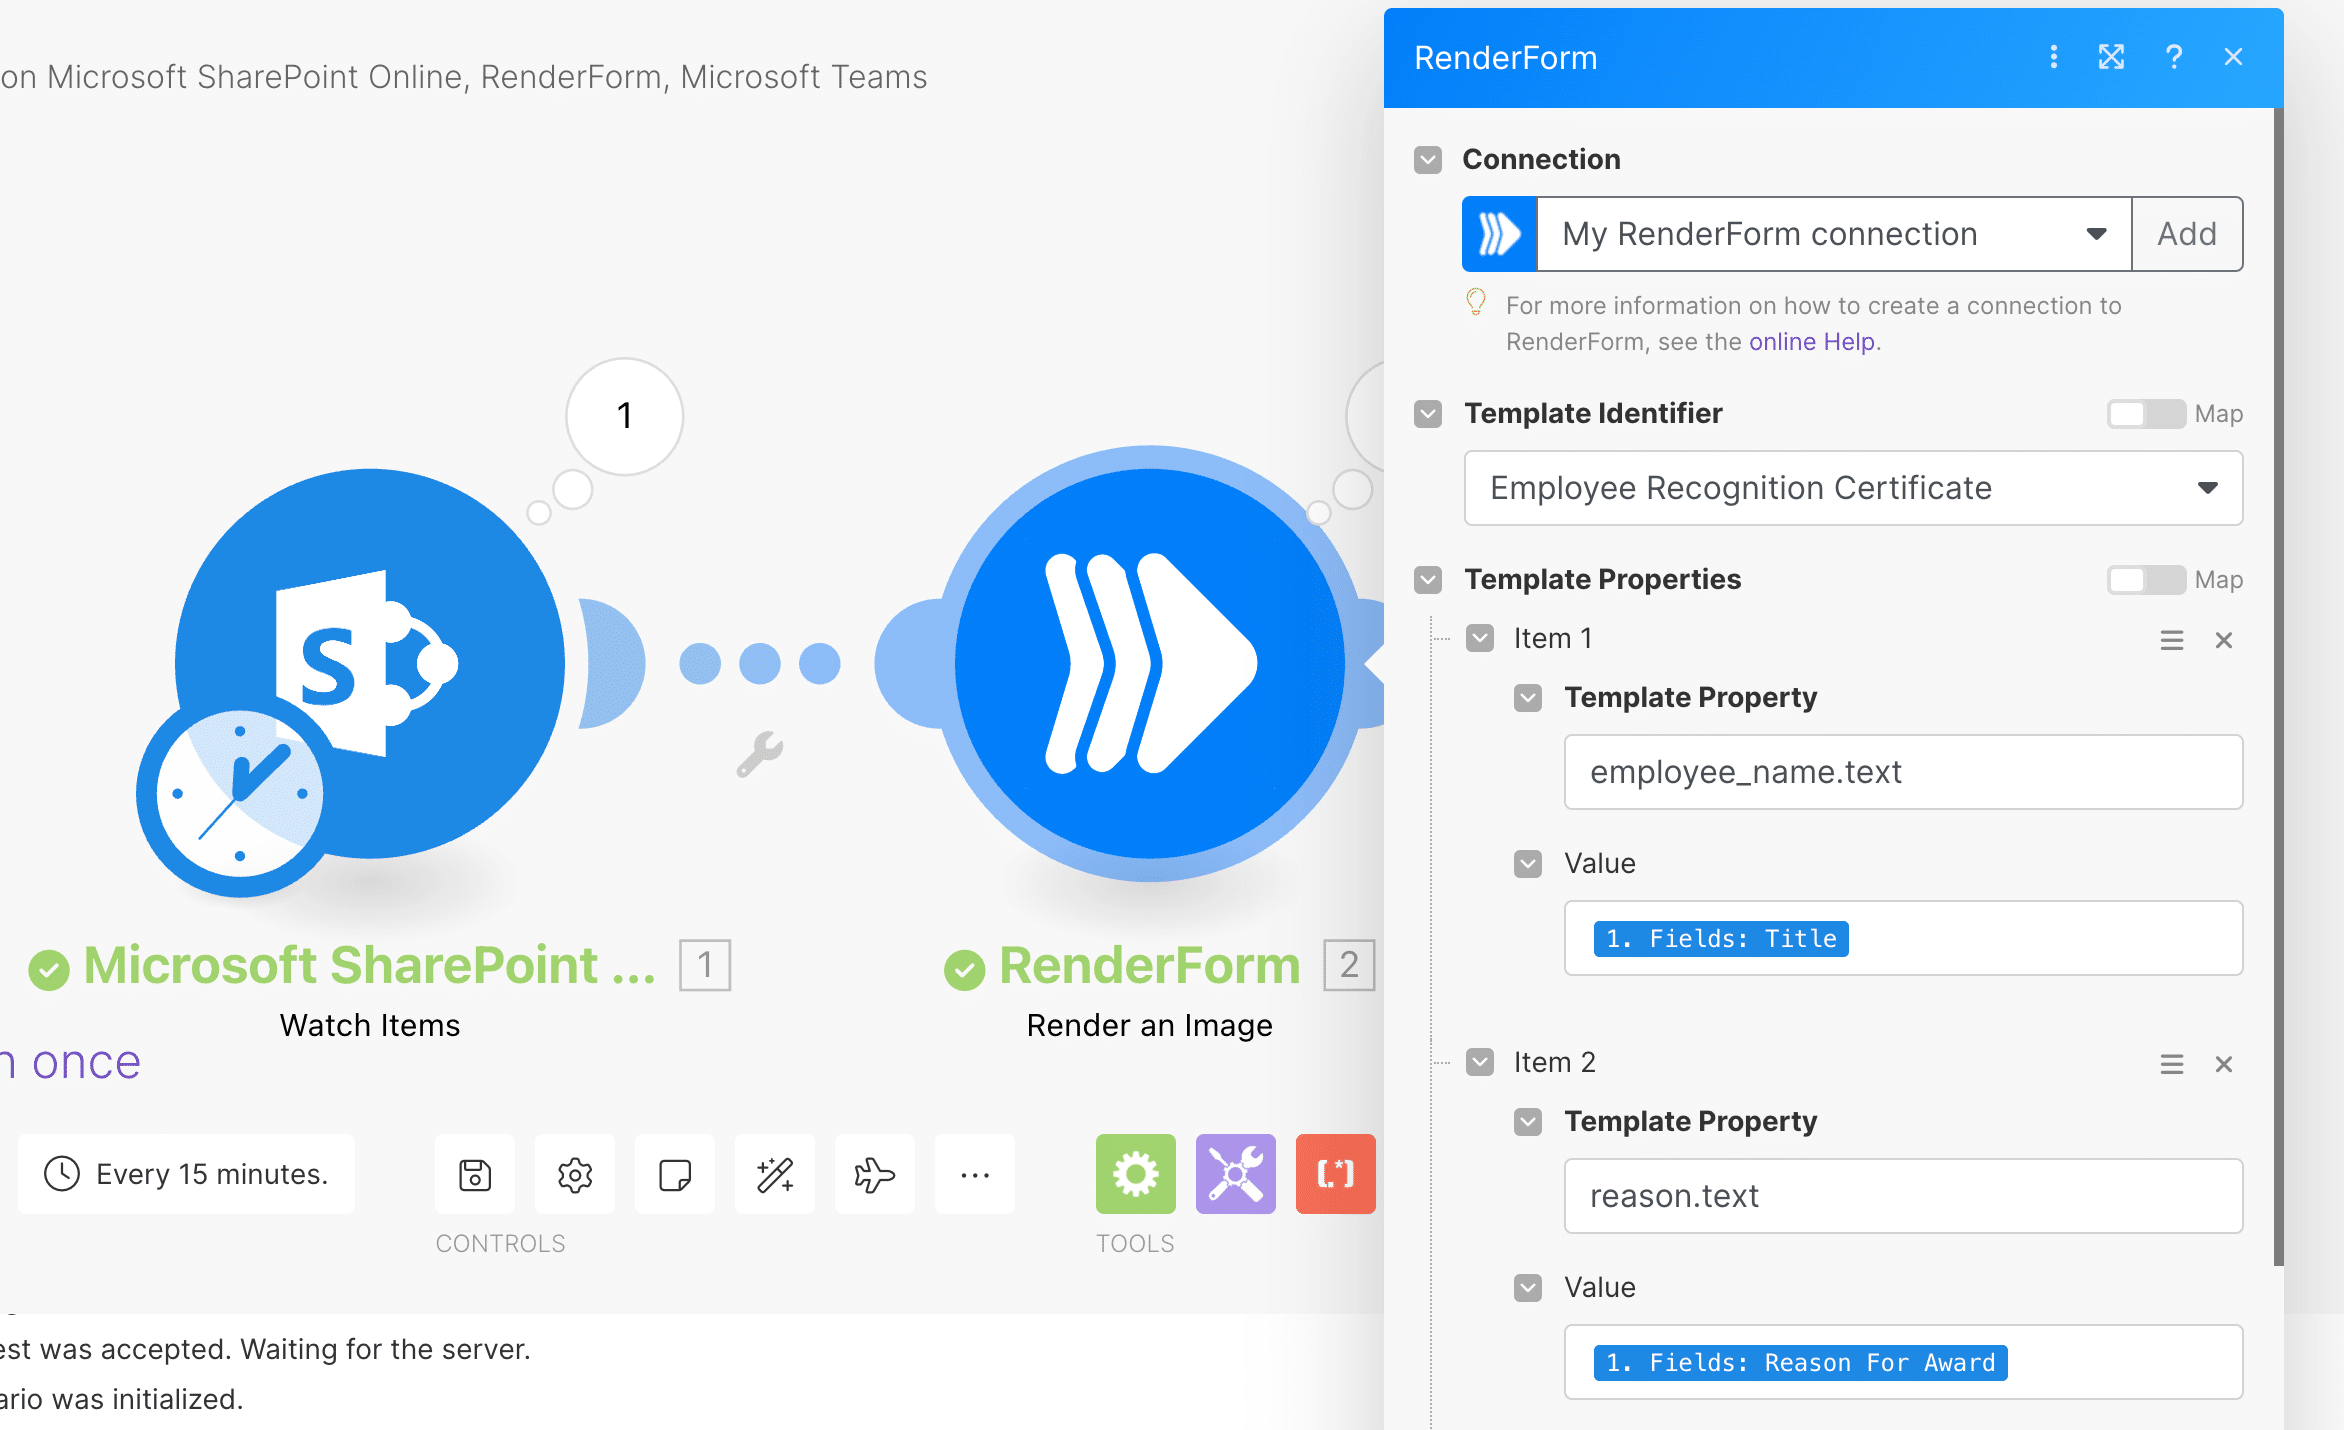
renderform configured in make
With these 2 steps, you've set up an automated workflow that creates a recognition card whenever a new entry is added to your SharePoint list. Now, we want to share the employees success by posting the certificate in a Microsoft Teams Channel. For this let's use the Microsoft Teams module in Make.com
Posting the employees success into Microsoft Teams
To post a message into a Teams Channel is very easy with Make.com. Follow these steps.
- Go back to your Make scenario and select the "Microsoft Teams" module and choose "Send Message".
- Select a "Team ID", "Channel ID" and configure it similar to the image below.
In this example, you are effectively creating a message in a Channel and used the newly created image to show off the employees success. I am also using the title (employees name) and reason for the award as the message:
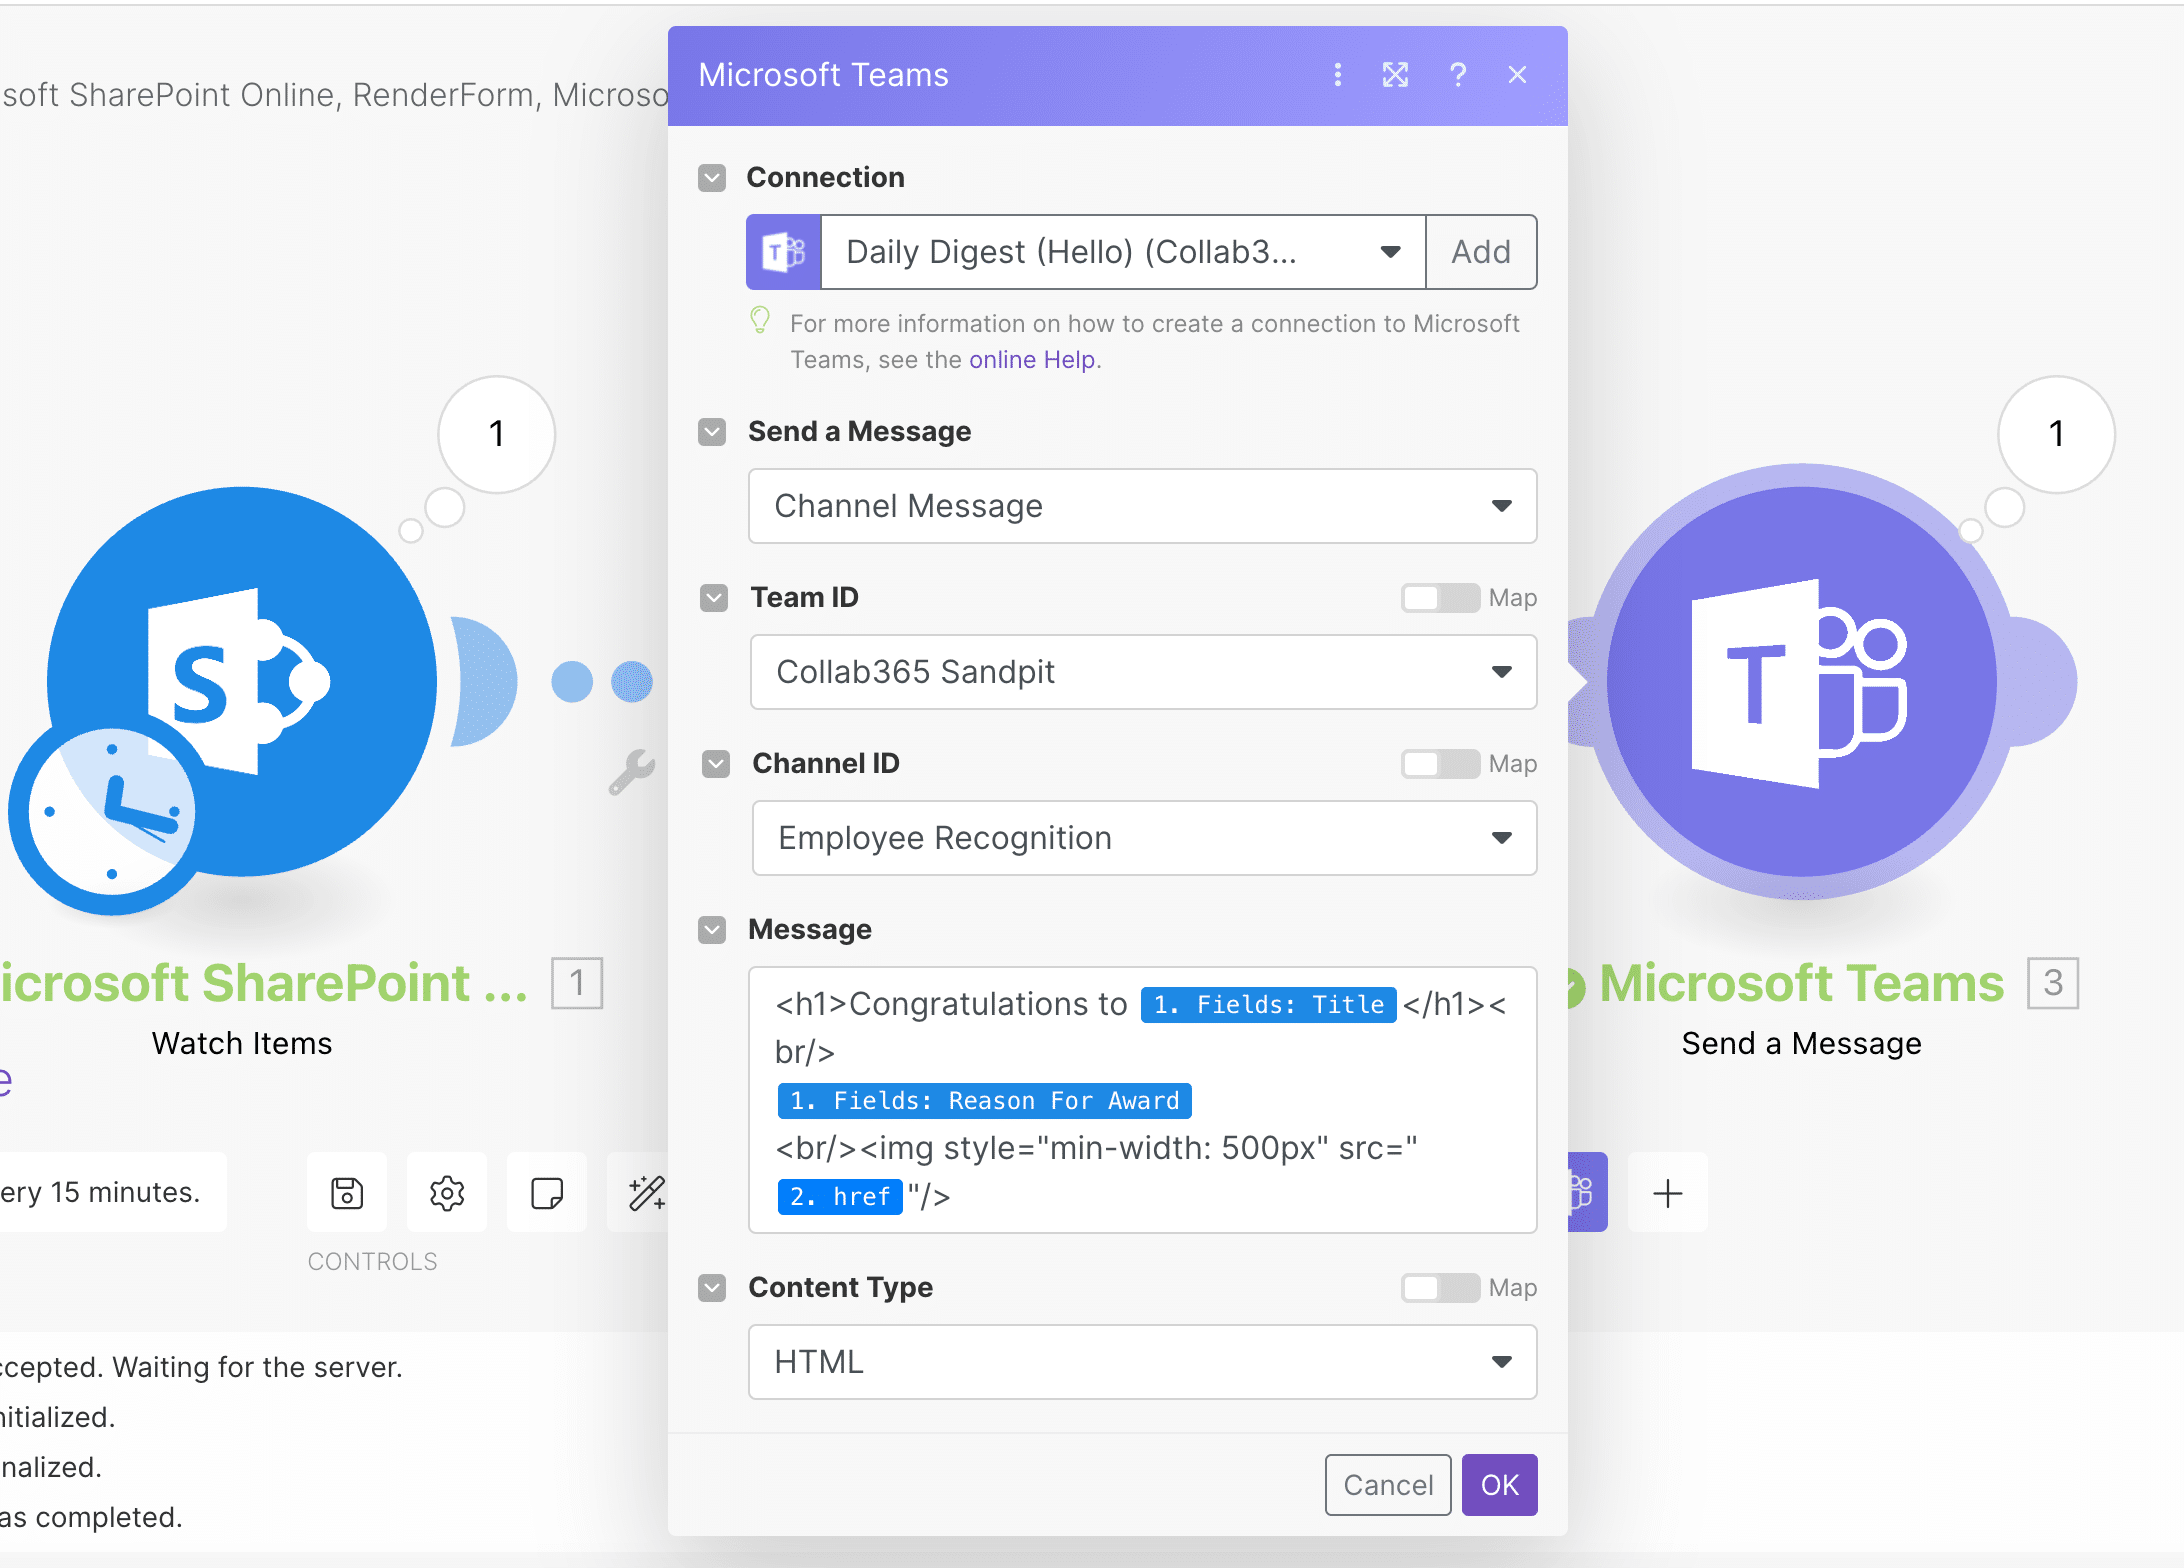
microsoft teams configured in make
Your final Teams Message should look something like this:
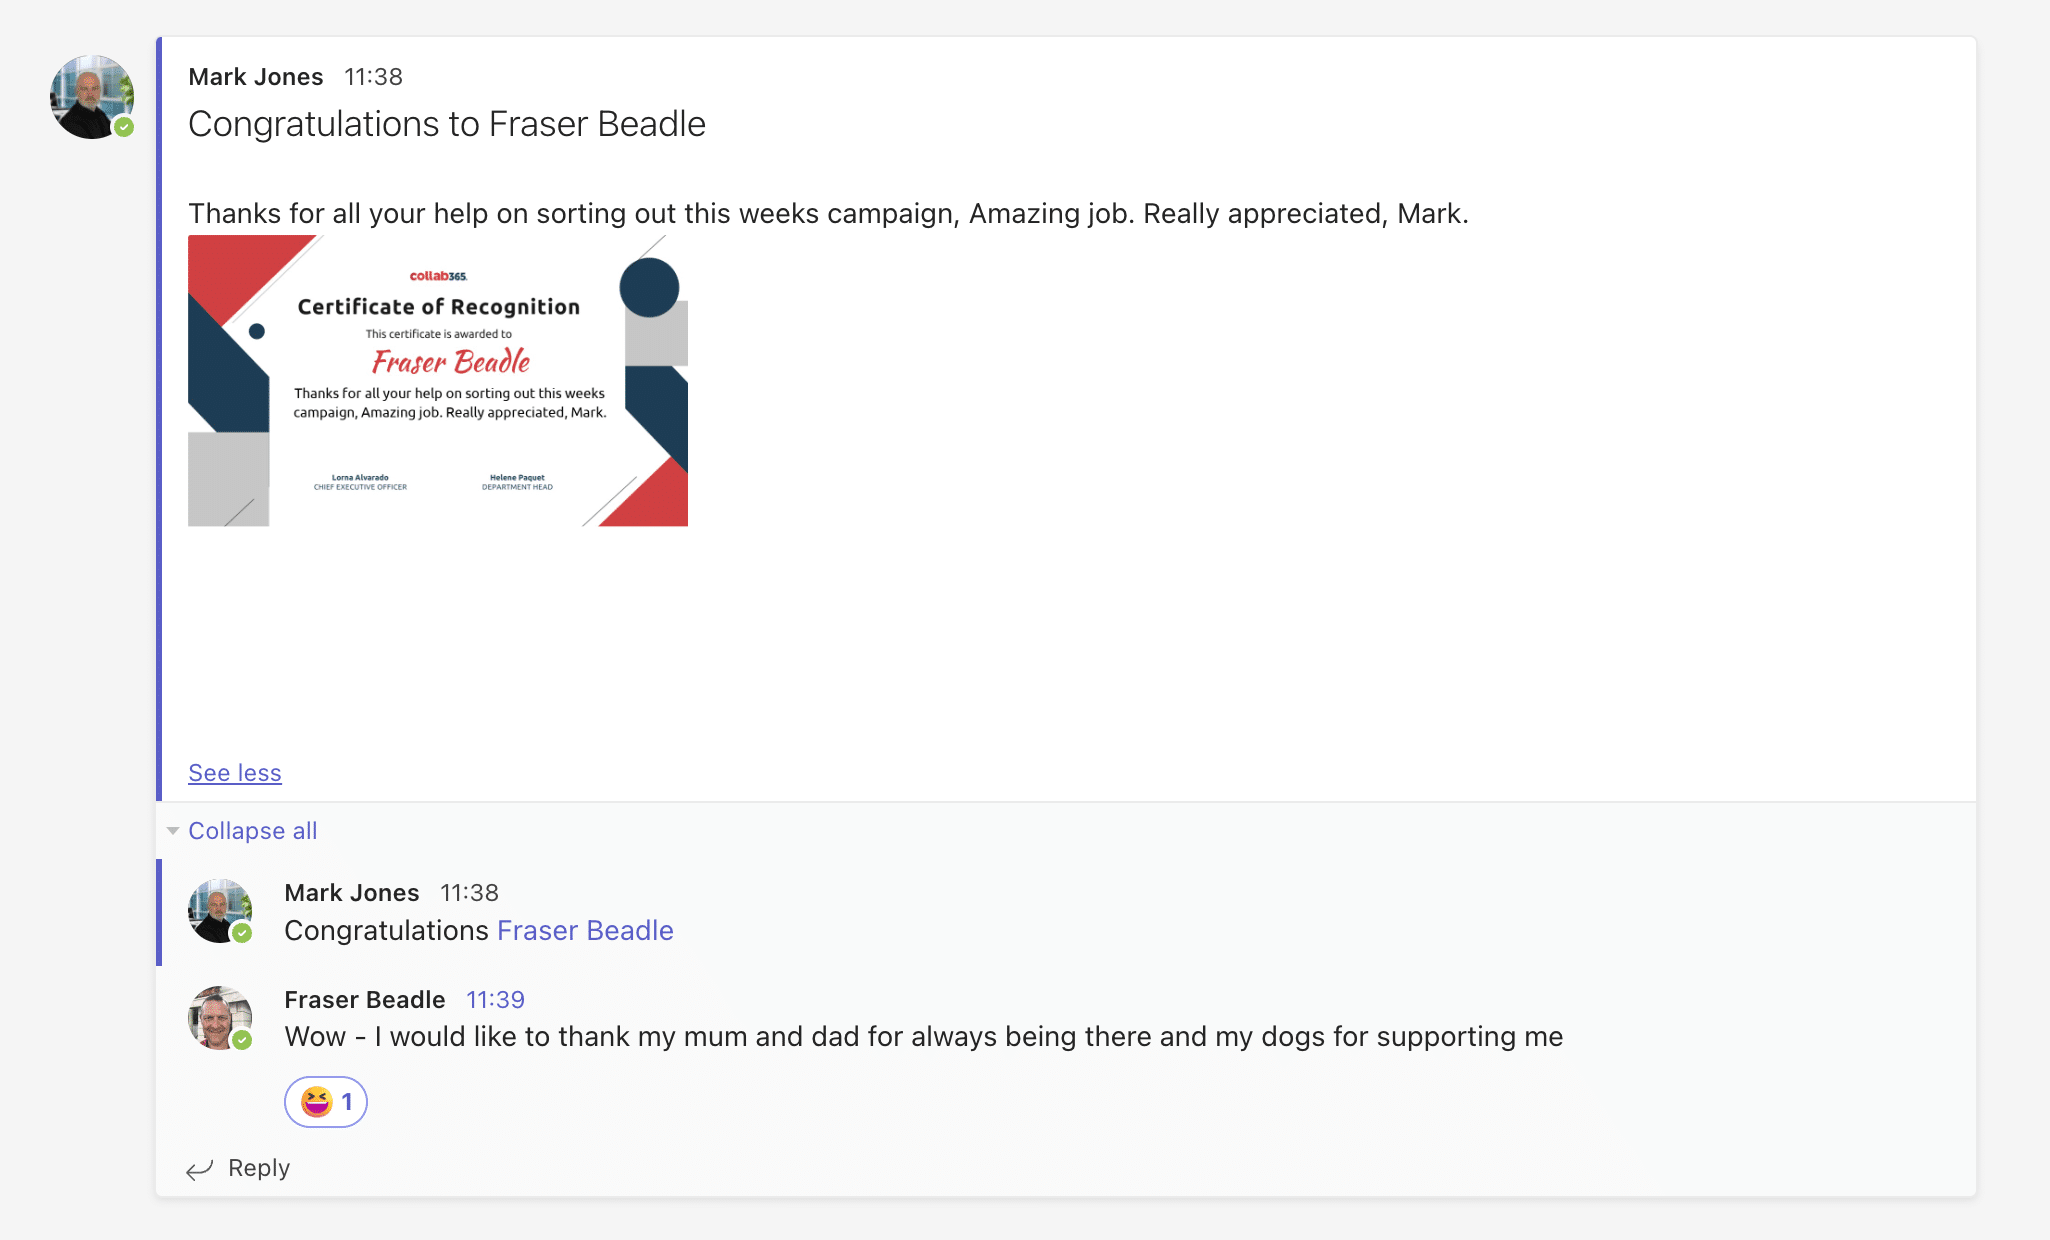
the final employee message in teams
Testing the Automation
Now that our automation setup is complete, we'll want to test it to ensure it's working correctly:
- Add a new item to the SharePoint list with the employee recognition details.
- Trigger the Make.com scenario manually by clicking "Run Once". This should grab your latest list item.
- RenderForm will then generate the image using the template and recognition data.
- The new Teams message (with the newly created image) should now be displayed in Teams.
Well done 😀
How could we improve our process?
- Add extra fields onto the certificate such as the person awarding the certificate.
- Add another module into the Make scenario to email the certificate to the employee. This would require you to also send the employees email address into Make (from the SharePoint List).
- Why not send the employee a spot award? You can connect various payment modules to Make so you could add an award amount and automatically use Paypal or Stripe to send the employee a gift over.
- Add the employees profile picture onto the dynamically generated image by using Power Automate to extract it and add it back into the List.
- Perhaps you want your recognition to go external by posting to social media sites like LinkedIn, Facebook etc? If so, this is very easy as Make supports them all.
- The World is your oyster really. Make has over 1000+ connected applications.
Conclusion
You've now successfully automated the process of creating and distributing personalised recognition cards. This not only saves time but also allows for greater personalisation and immediate recognition. You can easily adapt this setup to match your company's brand and the specific recognition needs of your employees.
Other Use Cases
The combination of SharePoint, RenderForm, and Make.com opens up a world of possibilities for automating various processes. Here are a few other ideas you can consider:
- Personalized event invitations: You could create personalized event invitations and send them to attendees via email.
- Dynamic project updates: If you're running a project with frequent updates, you could automate the creation of updated visuals.
- Automated report visuals: You could automatically create tailored visual representations of key data points for recurring reports.
- Customer recognition: You could create personalized appreciation cards for your customers on various occasions.
This tutorial helps you to automate your employee recognition process effectively. If you have any questions or need further assistance, please reach out. Happy automating!
