In our digital age, the rapid dissemination of information is both a boon and a challenge. With countless articles and resources released every minute, keeping track of valuable content relevant to our needs becomes daunting. What if we could automatically and systematically compile these articles without manually copying each one?
Specifically, having these articles in a SharePoint List can offer organized access and collaboration for businesses and professionals using SharePoint. However, while Microsoft's Power Automate provides a suite of automation services, it lacks a direct connector to bridge web articles directly into SharePoint.
That's where our heroes of the day, Feedly and Make.com, come into play. Feedly acts as our net, catching the articles we deem valuable, and Make.com serves as our trusty courier, delivering them straight into our SharePoint Lists. In this guide, we'll walk you through the entire process, ensuring that by the end, you can sync online articles into your SharePoint environment effortlessly.
Interested in a deeper look at when you'd use Make.com over Power Automate?
10 Practical Applications of Integrating Feedly Articles with SharePoint for Enhanced Information Management
Before we dive in to show you exactly how to set this up, you might be thinking "Why would I want to do this?", so here are a few examples where this process could be very handy:
Corporate News Aggregation: Organisations can use Feedly to curate relevant industry news or updates about competitors. This information can then be sent to a SharePoint list, ensuring that all employees have easy access to the latest market trends and insights.
Research Institutions: Researchers can use Feedly to track the latest publications, news, or findings in specific scientific domains. Pushing these updates to SharePoint allows for centralised storage and easy sharing among fellow researchers.
Content Marketing Teams: Content creators can monitor sources for content ideas or to stay updated on popular industry topics. By sending this data to SharePoint, editorial calendars can be easily updated, or content brainstorming sessions can be initiated.
Educational Institutions: Professors or teachers can use Feedly to curate relevant articles for courses or subjects. These articles can be sent to SharePoint, from where they can be shared with students, fostering a culture of continuous learning.
Public Relations Agencies: PR professionals can monitor media mentions of their clients. By integrating these mentions into SharePoint, they can quickly generate reports or track sentiment over time.
Financial Institutions: Financial analysts can keep track of news related to stocks, global economic events, or specific industries. Storing this information in SharePoint can facilitate discussions about investment strategies or market predictions.
Legal Firms: Lawyers can set up Feedly to monitor updates about specific laws, regulations, or high-profile cases. This information, when pushed to SharePoint, can be used to inform clients or guide internal discussions.
Non-Profit Organisations: NGOs can track news related to their cause or domain. This way, they can keep volunteers and stakeholders informed through a centralised SharePoint repository.
Event Planners: Professionals in the events industry can monitor articles related to event planning trends, new technologies, or success stories. By integrating these insights into SharePoint, they can innovate and enhance their event planning strategies.
Real Estate Agencies: Agents can use Feedly to gather articles about property trends, market analyses, or upcoming infrastructure projects. Sending this to SharePoint can help in making informed decisions or updating clients about market dynamics.
Hopefully, that's inspired you to give this a shot! This process is incredibly fast to set up:
- 5-10 minutes to create the SharePoint List
- 2 minutes to create a Make.com account.
- 2 minutes to create a Feedly account.
- 5 minutes to create the Make scenario.
- 5 minutes to test.
Start the clock and let's get started!
1. Setting Up Feedly:
1.1. What is Feedly?
Feedly is a popular content aggregation platform that allows users to consolidate and organize content from their favourite websites, blogs, and news sources all in one place. Think of it as a personalised digital magazine – it collects and curates articles based on your interests and preferences, ensuring you never miss out on relevant content.
Imagine being able to do this:
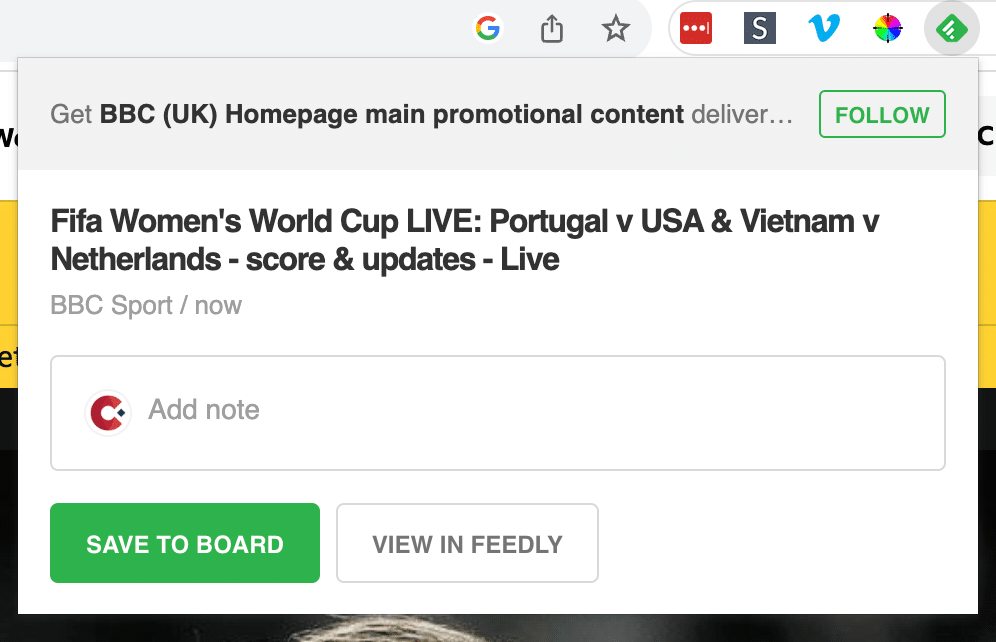
Feedly also has a handy chrome extension, which makes it really easy to add an article to a "board" when you see it. Imagine, find an article that your team would love to read. All you need to do is click the browser extension and "SAVE TO BOARD". A few seconds later your brilliant article is the SharePoint List and your team think you are the best thing since sliced bread!
1.2. Creating an Account:
Getting started with Feedly is straightforward. Here's a step-by-step guide:
- Navigate to the Feedly website.
- Click on the "Get Started for Free" button at the top right.
- Sign up using your Google, Facebook, Apple, or Microsoft account. Alternatively, use your email address to create an account.
- Once you've signed up, you'll be redirected to your Feedly dashboard. This is where all the magic happens!
1.3. Setting Up Your Feed:
Now that you have an account, it's time to curate your content feed.
- On the Feedly dashboard, use the search bar to look for topics, websites, or keywords that interest you.
- Feedly will suggest various blogs, websites, and news sources as you search. Click the "+Follow" button next to any source you want to add to your feed.
- These sources will now appear in the left sidebar under "My Feeds". Every time you log in, you'll see updated articles from these sources in your main dashboard area.
- You can also add sites that you want to follow.
- Plus don't forget, you can use the Chrome extension to add articles into your board on an adhoc basis.
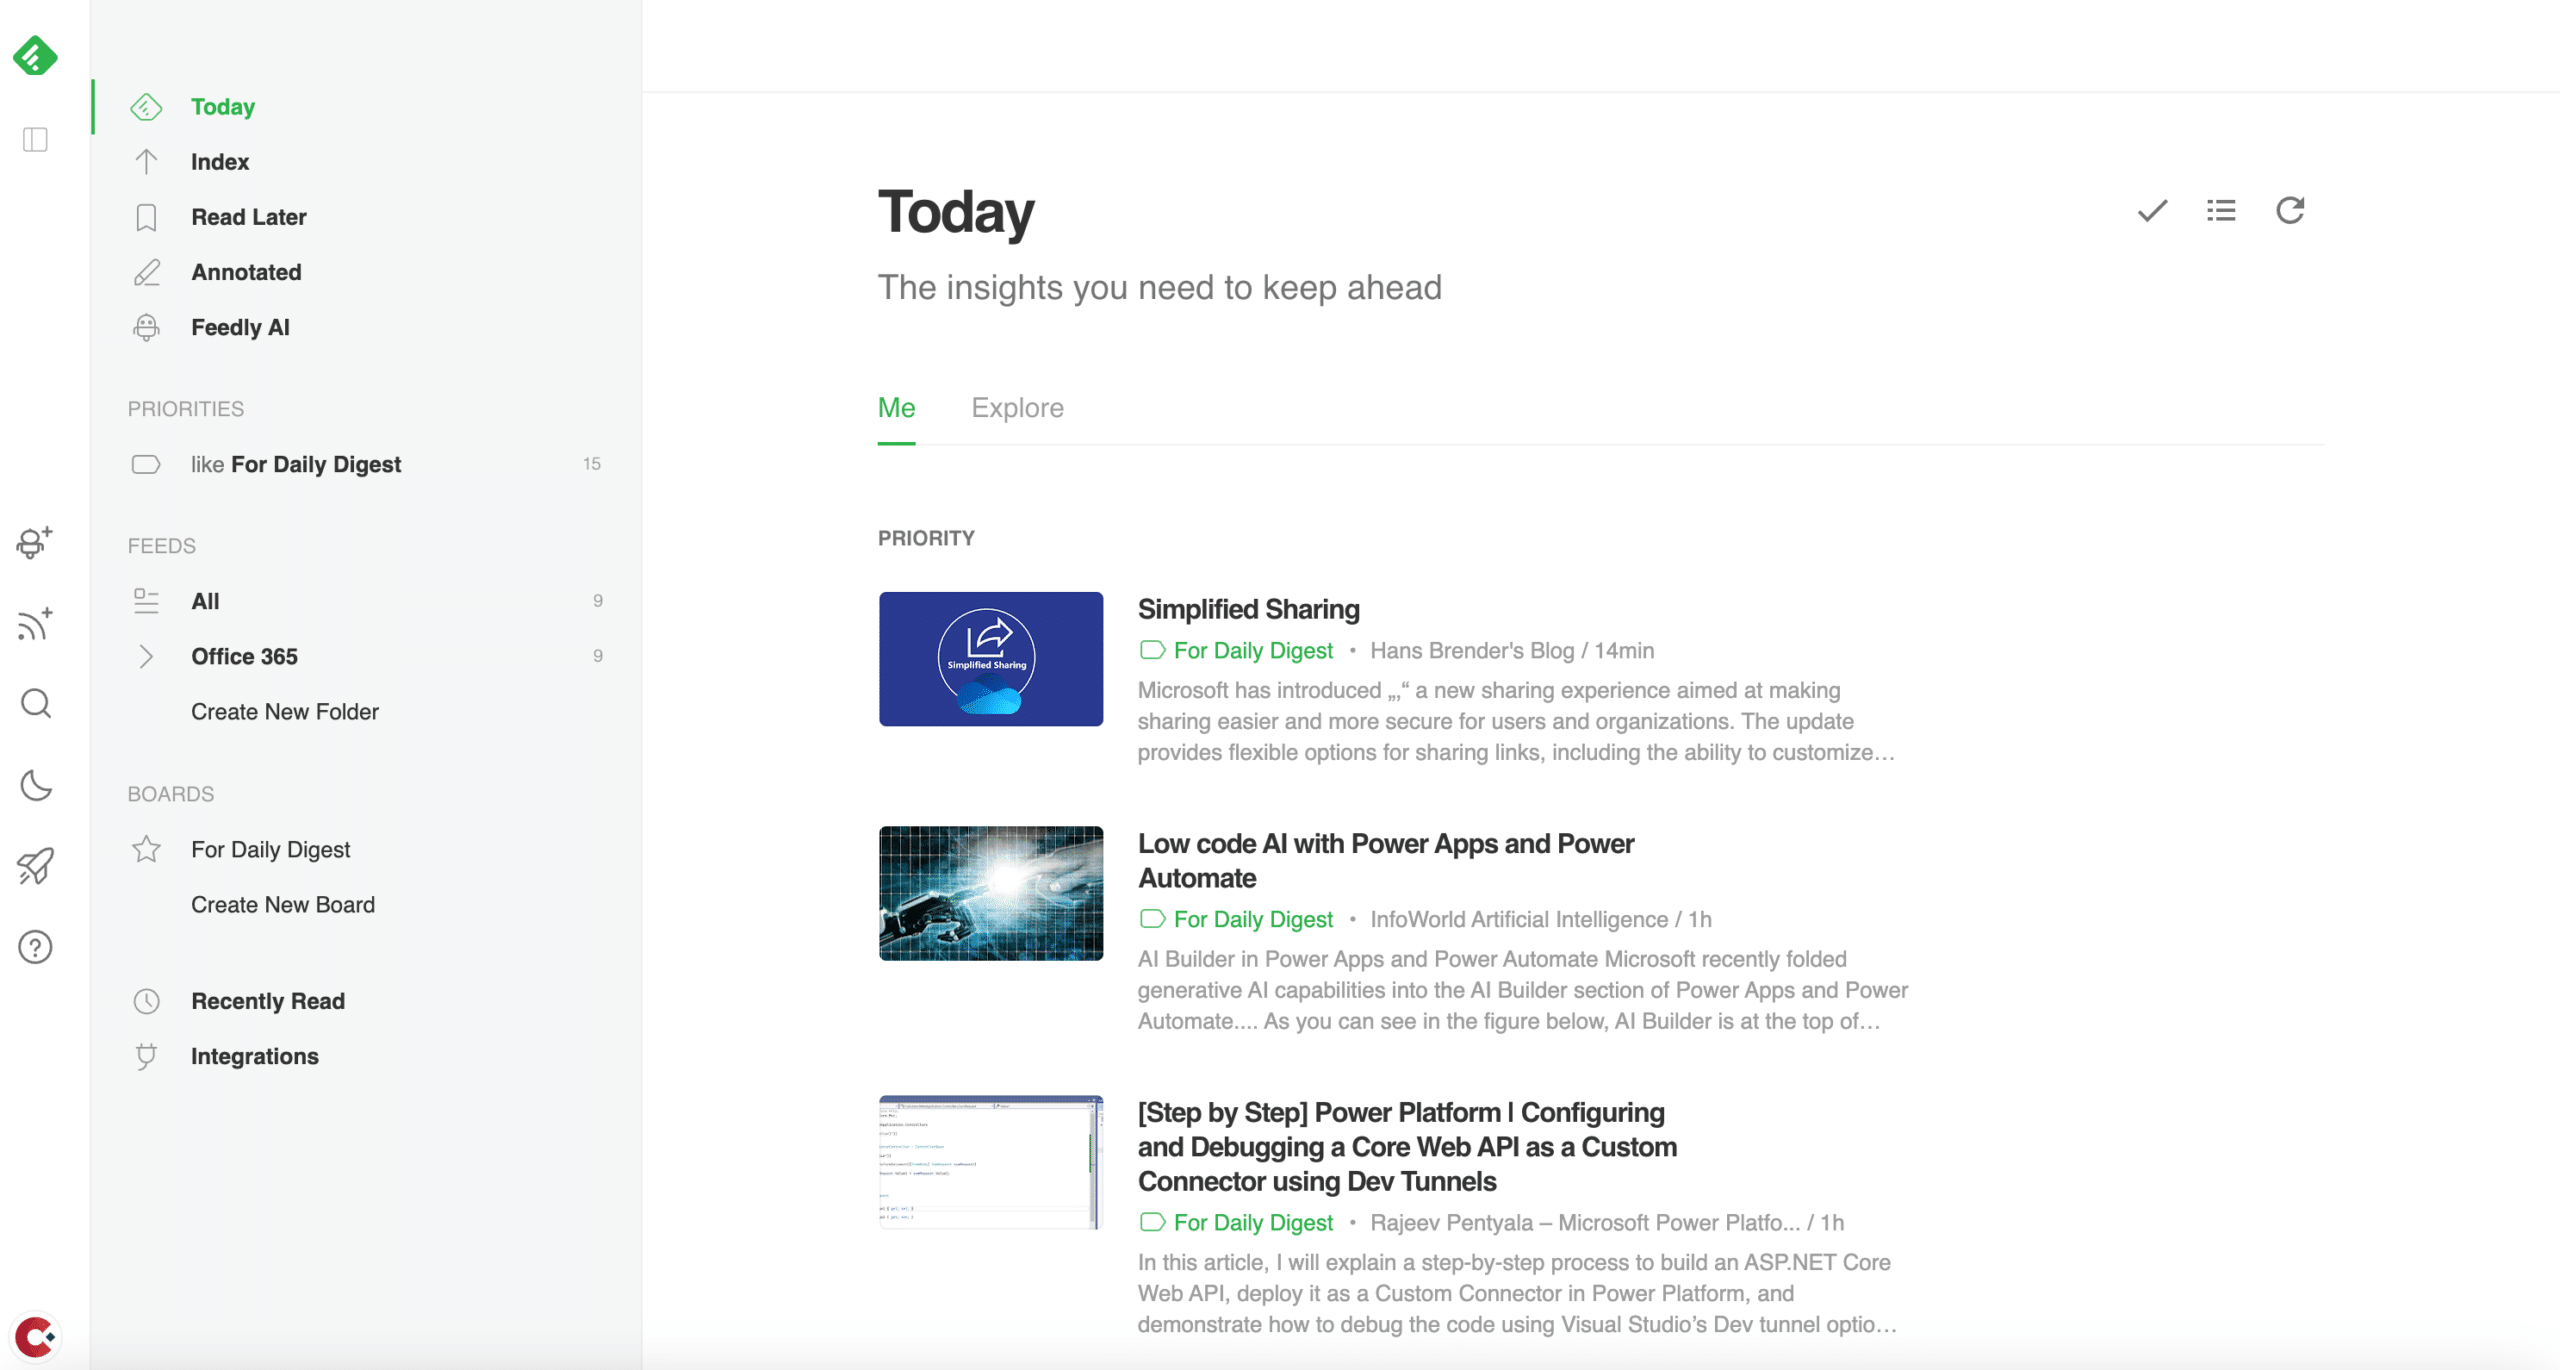
1.4. Understanding the "Save to Board" Feature:
Boards in Feedly are similar to folders or collections where you can save specific articles for later reading, sharing, or, in our case, syncing to SharePoint.
- To save an article to a board, hover over the article and click on the bookmark icon.
- If you're using Feedly for the first time, it will prompt you to create a new board. Name it appropriately (e.g., "SharePoint Sync").
- In the future, you can click the bookmark icon on any article and select your board to save articles.
Now that Feedly is set up, the next step is to integrate it with Make.com to automate the transfer of saved articles to your SharePoint List.
2. Introduction to Make.com (formerly Integromat):
2.1. What is Make.com?
Make.com, previously known as Integromat, is a powerful online automation platform (similar to Power Automate) that connects many apps, services, and systems. Think of it as a digital go-between, seamlessly transferring data from one place to another without manual intervention. With its visual interface, users can create intricate 'scenarios' (automation workflows) by linking multiple applications, allowing them to automate tasks that would otherwise require manual input.
Its capabilities go beyond simple task automation; it can transform, filter, and process data in real time. This makes Make.com an indispensable and very affordable tool, especially when a direct connector is absent, like in Microsoft's Power Automate for our current use case.
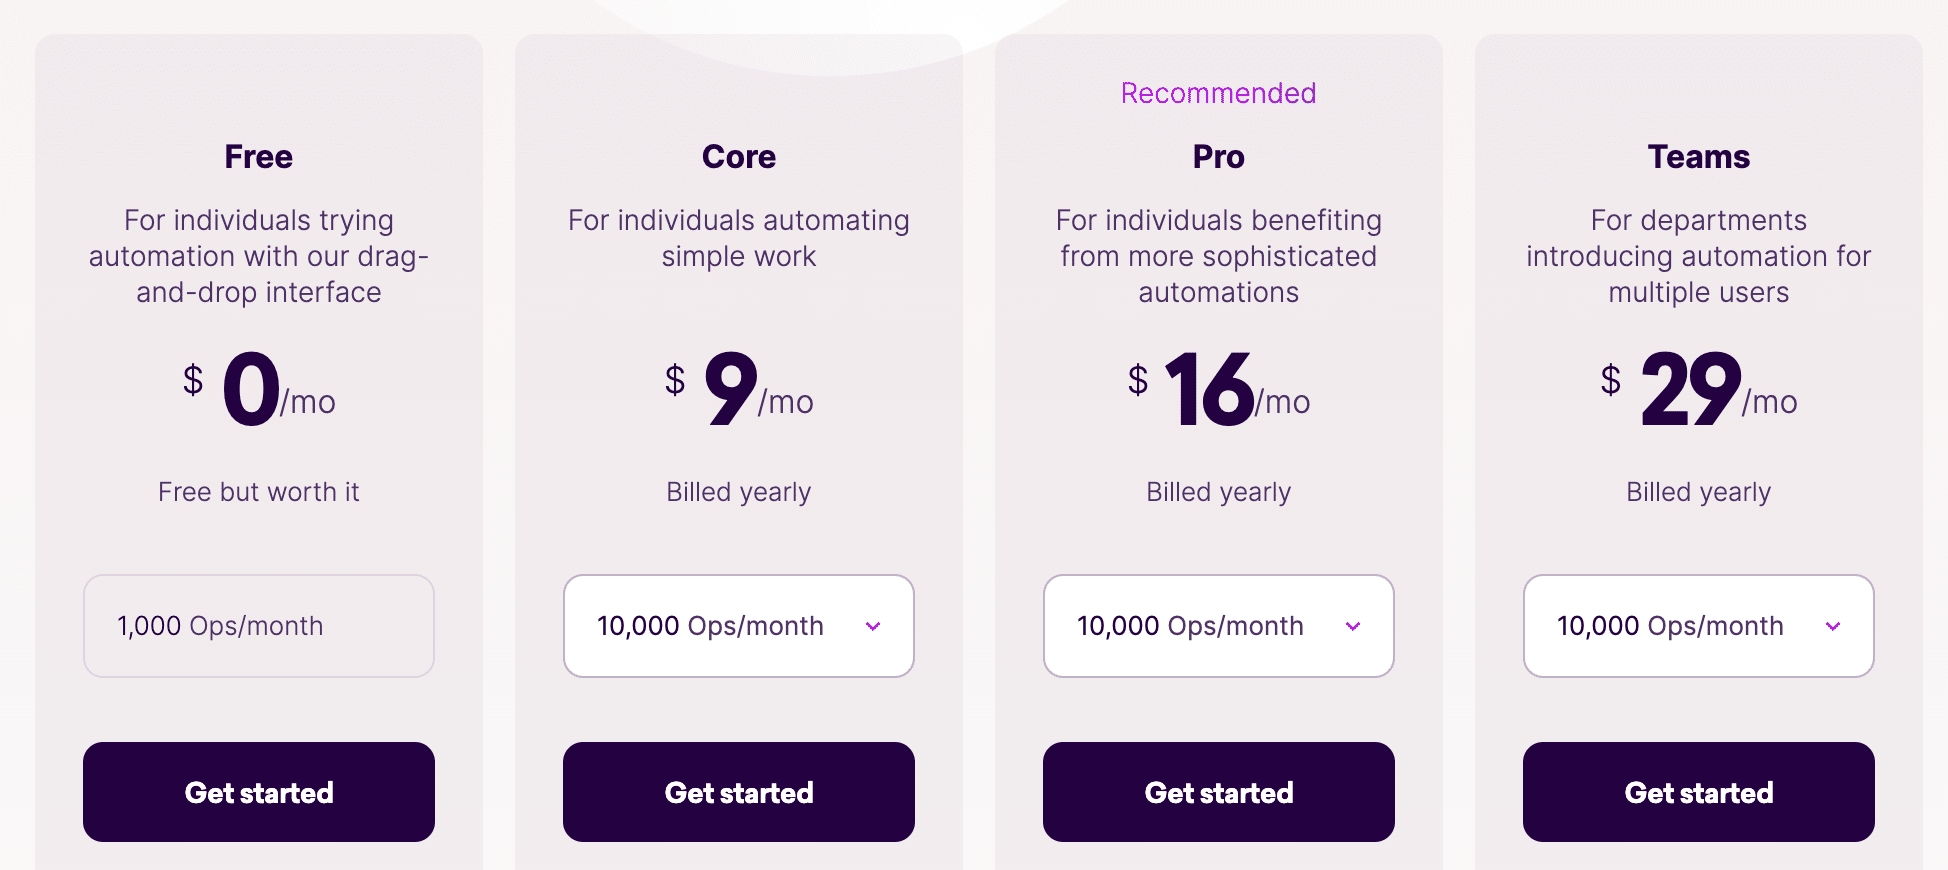
Make.com offers a free plan and also cheap. The Free Plan means you can push 500 articles into SharePoint every month!
2.2. Creating an Account:
Before we dive into creating our first scenario, let's get you signed up:
- Visit the Make.com website.
- Click on the 'Sign Up' or 'Start for Free' button, typically found at the top right.
- You'll be prompted to enter your email address and choose a password. Alternatively, you might find options to sign up using Google or other third-party accounts.
- Follow the on-screen instructions. After confirming your email, you'll be directed to your dashboard on Make.com.
- Taking a quick tour or going through the onboarding tutorial is a good idea. It provides a brief overview of the platform's features and how to navigate around.
With your Make.com account ready, the following sections will guide you on setting up a scenario to listen for saved articles in Feedly and then forwarding those to a SharePoint list.
3. Setting up Make.com to Trigger Feedly Activity:
Automating any process requires a trigger – an event that starts the flow of actions. In this context, our trigger will be saving an article to a board in Feedly. Once that happens, we want the subsequent action to add that article to SharePoint. Let's get started:
3.1. Building the Scenario:
Accessing Scenario Builder:
- Once logged in to Make.com, navigate to the dashboard.
- Click on the 'Create a new scenario' button. This will open the scenario builder, a visual workspace where you can design your workflow.
Searching for the Feedly Service:
- In the scenario builder, you'll find a search bar labelled 'Search for apps...'. Type in "Feedly" and select it from the dropdown.
Selecting Feedly as the Trigger Service:
- Once you've added Feedly, you'll be asked to choose a trigger. Select "New article saved to Board" or a similar option that denotes a new saved article event.
3.2. Configuring the Feedly Trigger:
Granting Access:
- You'll need to connect the two services to allow Make.com to listen for events in your Feedly account.
- Click on the Feedly module you added. A window will pop up, prompting you to sign in to your Feedly account. Proceed and grant the necessary permissions.
Configuring the Trigger:
- Once connected, you'll need to specify which board Make.com should monitor. If you followed the earlier steps, select the board you created in Feedly (e.g., "SharePoint Sync").
- Adjust any additional settings as needed.
Finalising the Setup:
- Once everything is configured, click 'OK' or the confirmation button to finalise this part of the setup.
Your Feedly trigger is now set! Whenever you save an article to your specified board in Feedly, Make.com will be alerted. The next step, section 4, will detail how to send this data to SharePoint.
4. Integrating SharePoint with Make.com:
Now that you have Make.com poised to detect when you save an article on Feedly, it's time to channel this trigger into a tangible action: sending this data to your SharePoint list. Let's walk through the process:
4.1. Adding SharePoint as an Action:
Accessing Scenario Builder in Make.com:
- If you still need to get there, navigate to the scenario builder where you set up the Feedly trigger.
Searching for the SharePoint Service:
- In the scenario builder, look for the '+' icon (usually, it appears to the right of the Feedly module). Click it, then search for "SharePoint" in the service search bar and select it from the dropdown.
Choosing SharePoint Action:
- You'll be asked to select an action. For our purpose, choose the "Create List Item" option or a similar option that indicates creating a new item in a SharePoint list.
4.2. Configuring the SharePoint Action:
Connecting to SharePoint:
Click on the SharePoint module you've added. A window will pop up, prompting you to connect to your SharePoint account. Input the necessary credentials and grant permissions for Make.com to interact with your SharePoint.
Specifying SharePoint Details:
You'll need to provide specific details to direct where the articles should be saved.
- Site URL: Input the URL of the SharePoint site where your list is located.
- List Name: Select or input the list name you wish to save the articles to.
Mapping Article Data:
This step ensures that the correct data from the saved Feedly article is pushed into the appropriate SharePoint list columns:
- Title Column: Map this to the title of the Feedly article.
- Link Column: Map this to the link or URL of the Feedly article.
- Summary Column: Map this to the summary or description of the Feedly article.
- Make sure to adjust and map other relevant data as per your SharePoint list's structure.
- RED HOT TIP: We use this same process for our Collab365 Daily Digest Newsletter. We took it one step further and asked Open AI (aka ChatGPT) to summarise the articles for us and it's incredible! If you want to know how we did this, let me know at [email protected].
Your final scenario should look like this:
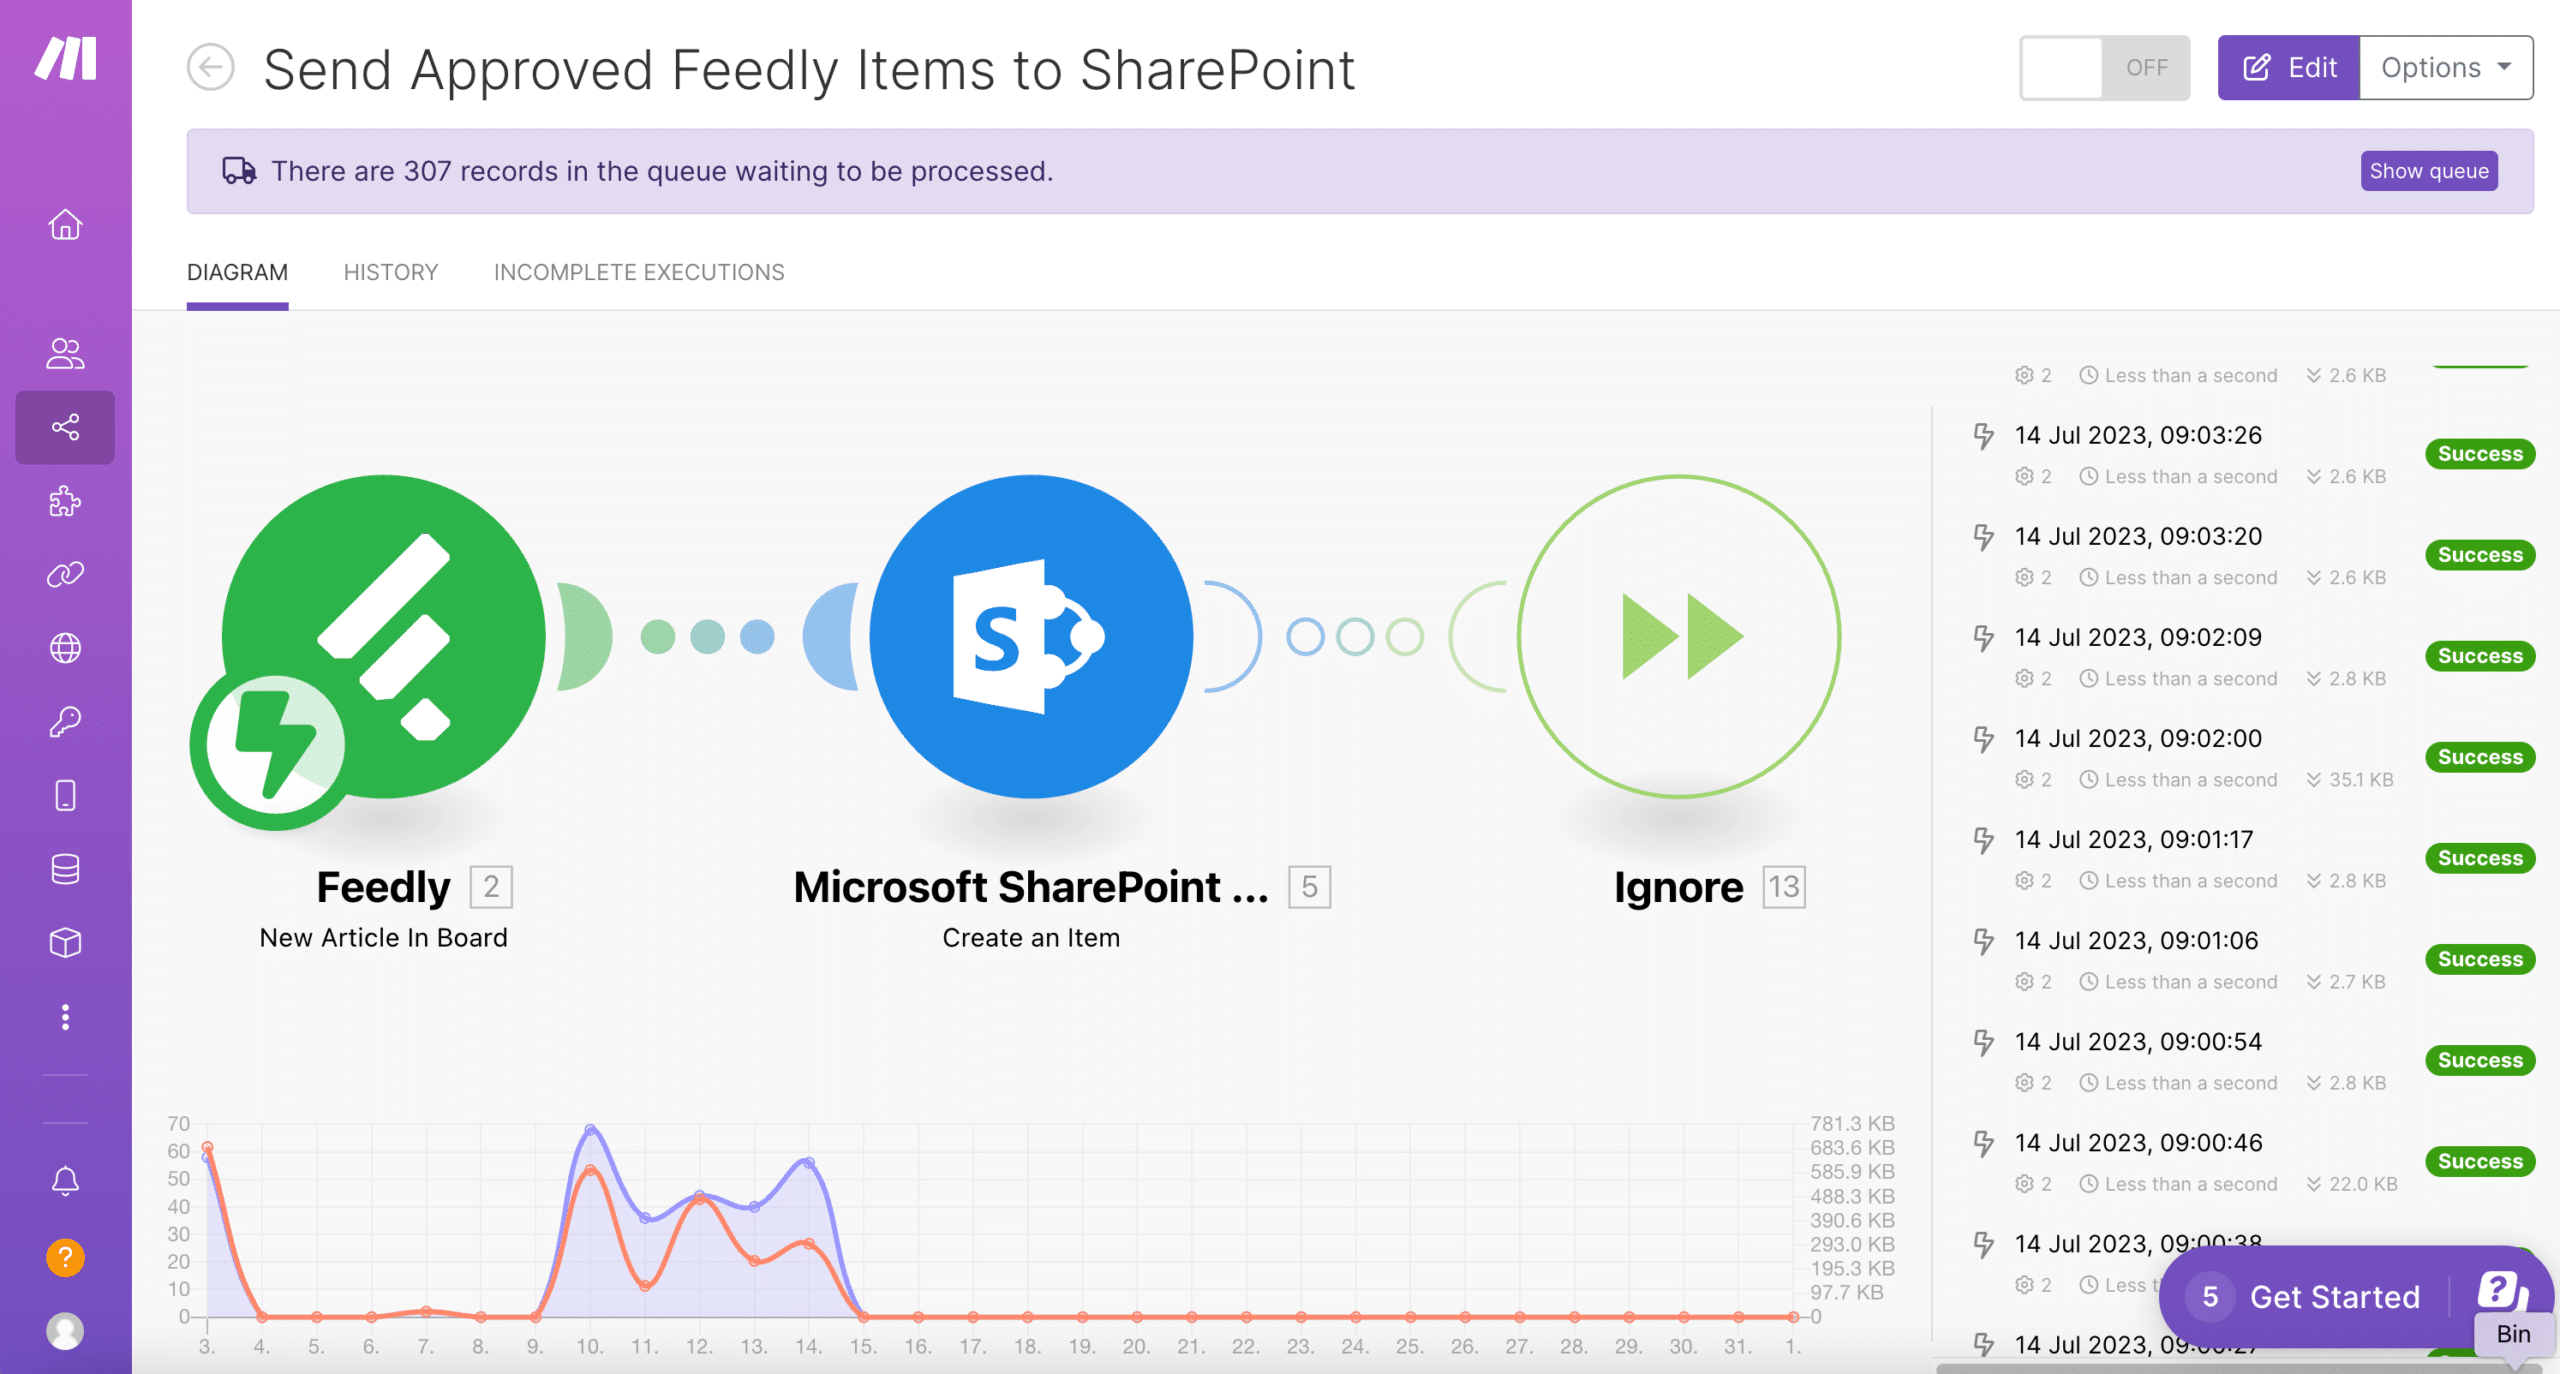
feedly to sharepoint with make
4.3. Error Handling and Logging:
Automation isn't foolproof. There might be instances when data might not sync correctly, or some other error might crop up. Here's how to keep track:
Adding an Error Handler:
- In Make.com's scenario builder, look for the option to add an error handler (typically represented as an exclamation mark or similar icon). Attach this to the SharePoint module.
Setting up Notifications or Logs:
- Configure the error handler to send you an email notification or to log the error in a specific location whenever there's an issue during the synchronization process.
- Consider creating a separate SharePoint list or another logging method to keep a record of any hiccups in the system.
5. Testing the Workflow:
After diligently setting up the automation flow, testing the end-to-end process is essential to ensure that everything functions as anticipated. This step is crucial, confirming that your setup is foolproof and ready for practical use. Let's walk through this phase:
5.1. Save an Article in Feedly:
Access Your Feedly Account:
- Start by opening Feedly in your preferred web browser or its app if you have it installed.
Browse Through Your Feed:
- Scroll through the articles from your subscribed topics, websites, or keywords.
Selecting an Article:
- Pick any article that piques your interest. It's merely for testing purposes, so the content doesn't matter much.
Saving to the Board:
- Click or tap on the article to open it.
- Locate the "Save to Board" feature. If you've set up a specific board for this purpose, ensure you save the article to that board.
5.2. Verifying in SharePoint:
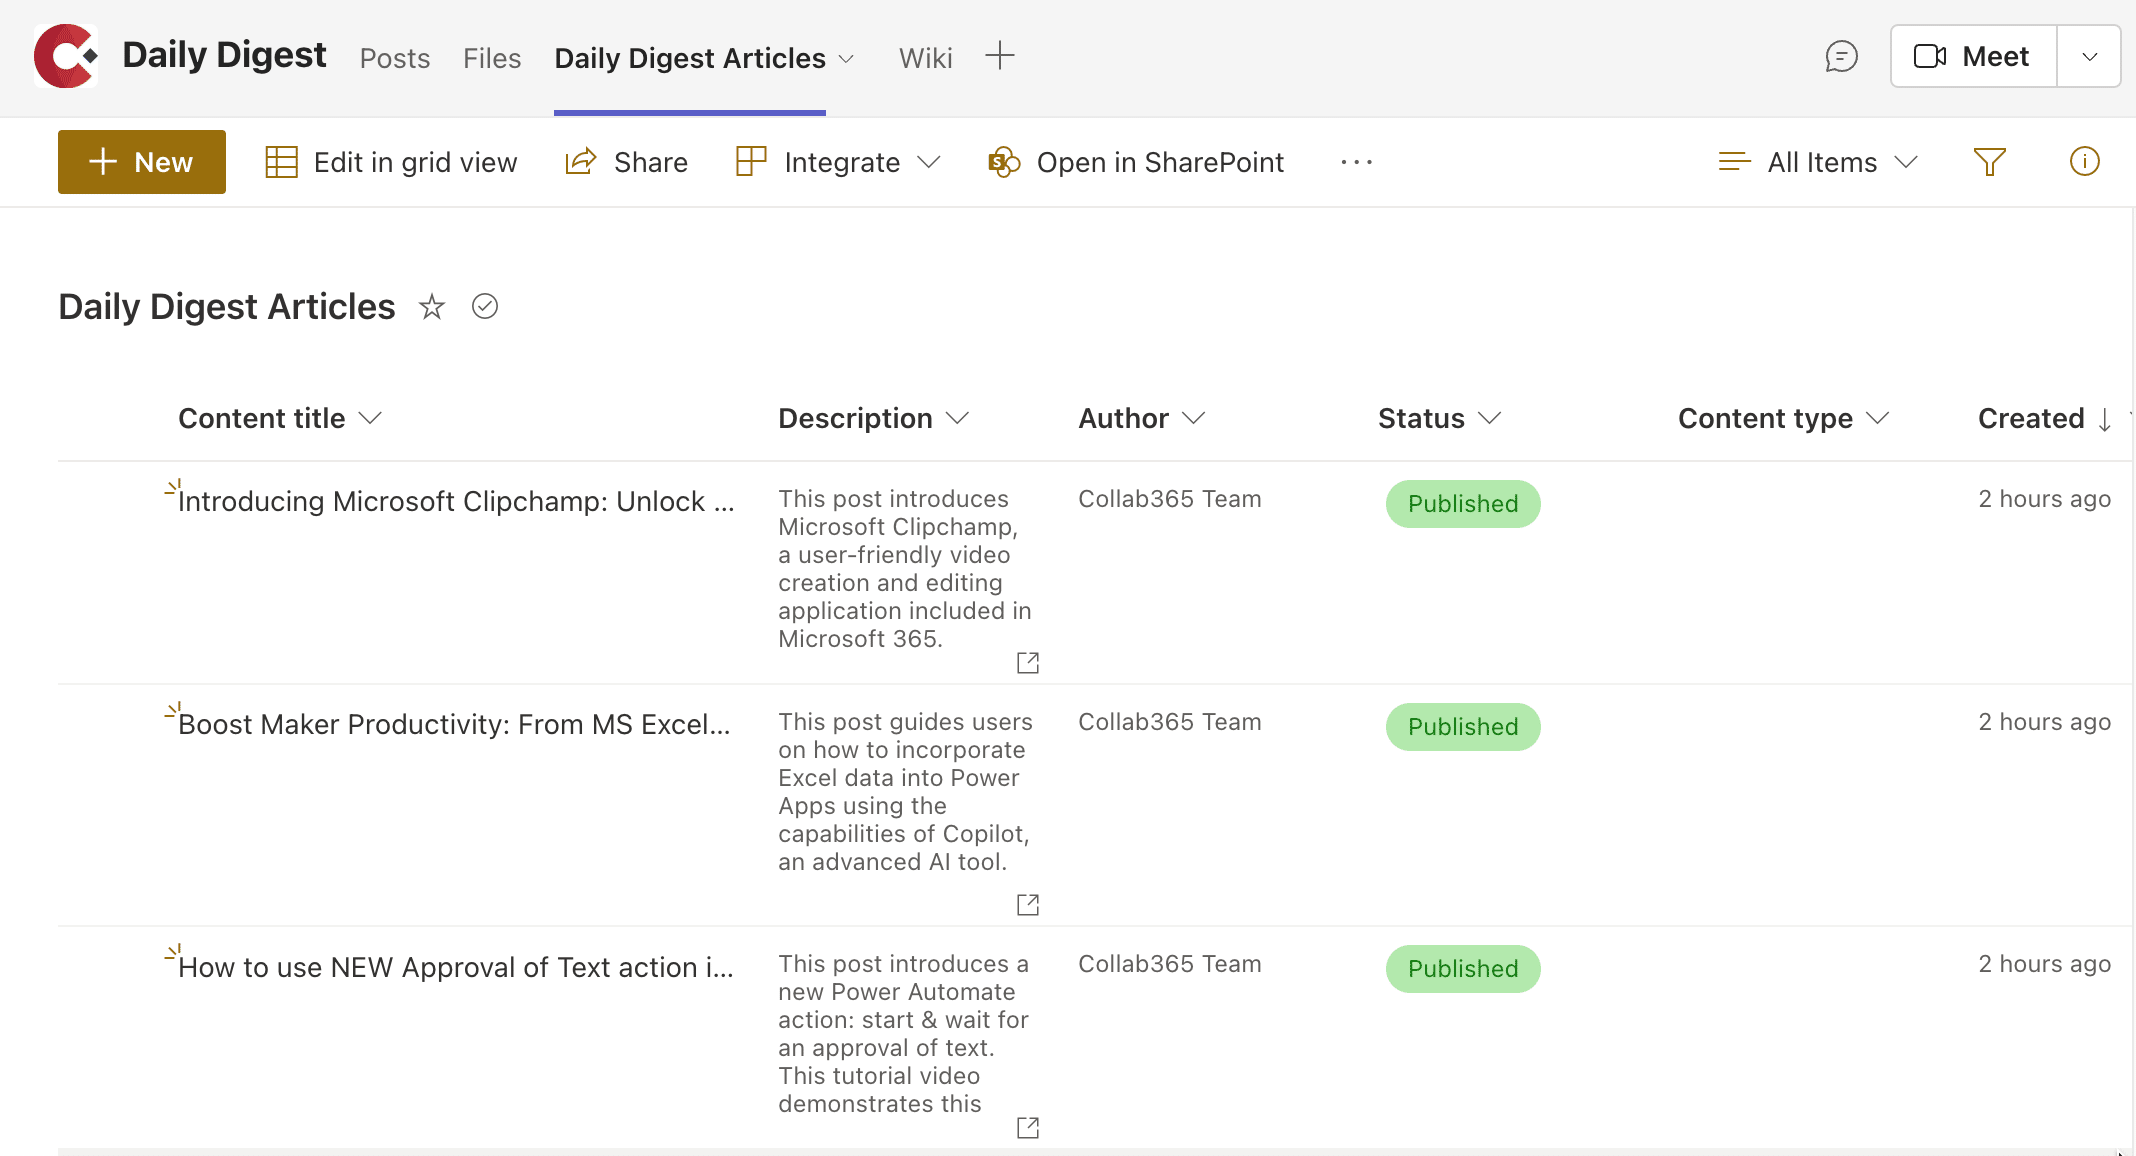
Allow for Some Processing Time:
- After saving the article in Feedly, wait for a few minutes. The duration depends on the frequency of Make.com's checks, which might vary based on your settings or plan.
Access Your SharePoint List:
- Navigate to the SharePoint site and list where you've configured the articles to be saved.
Checking for the New Entry:
- Refresh your list, and you should see a new entry corresponding to the article you just saved in Feedly. Ensure that all details, like the title, link, and summary, are accurately captured.
Troubleshooting (if necessary):
If you don't see the article reflected in your SharePoint list:
- Check the error logs or notifications you've set up on Make.com.
- Ensure that the Feedly board you save articles to is configured in Make.com.
- Double-check your mapping configurations in Make.com to ensure that all fields match correctly.
Congratulations! If your test article appears in the SharePoint list, your integration has been successfully set up. This means you've now unlocked the ability to automate the transfer of articles from Feedly directly into SharePoint, saving you time and ensuring that relevant information is always at your fingertips. In the next section, we'll wrap things up and explore the broader potential of this automation.
6. Concluding Thoughts:
As we conclude our guide, we must reflect on the journey and acknowledge the power and efficiency automation brings to our daily tasks.
Automation and Integration: The Dynamic Duo
At the heart of this guide lies the concept of integration and automation. The union of Feedly and Make.com channelled into SharePoint, isn't just a demonstration of the technology. It's about making information more accessible, organized and ensuring we stay updated without manually checking or updating lists. In a digital age where information is abundant, such automation ensures that we remain efficient, organized, and always a step ahead.
Exploring Beyond the Horizon
What we've covered is just the tip of the iceberg. Both Make.com and Feedly offer a plethora of other features and integrations. Would you like notifications for particular types of articles? Or automatically sharing certain articles on your corporate intranet or social media platforms? The possibilities are almost endless, and by diving deeper into the capabilities of both platforms, you can craft workflows tailored precisely to your needs.
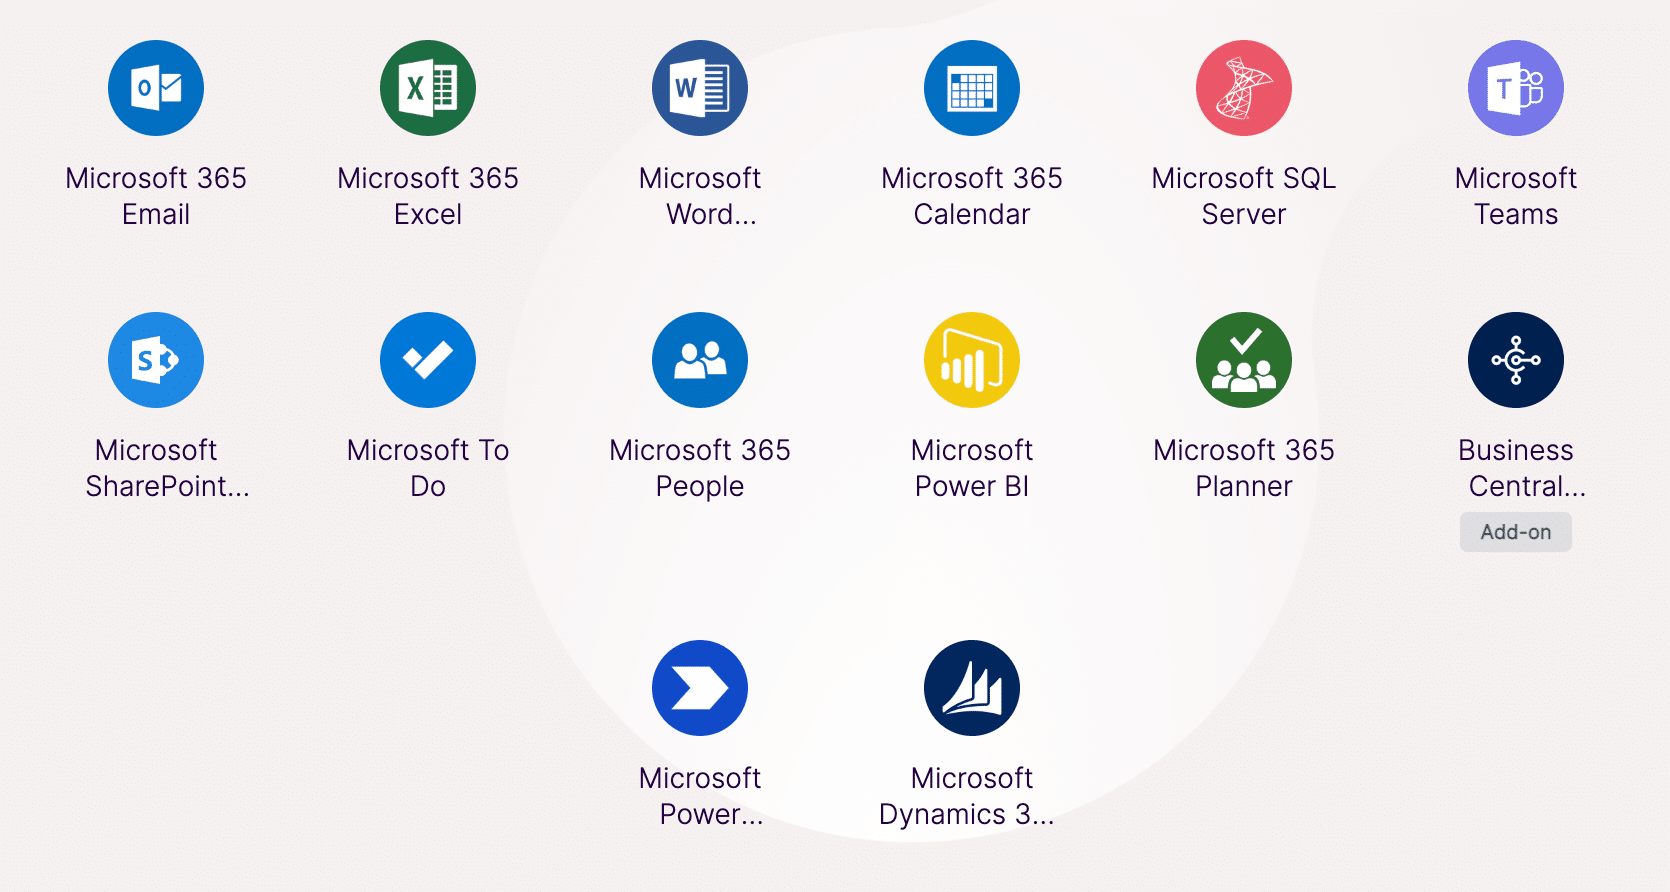
The example we showed in this tutorial illustrated how easy (and cheap) it was to push an article into SharePoint. You could easily change that to push an article into a Teams Channel or Chat Message. Perhaps you'd like it in Excel or Planner? The World is your oyster!
Continuous Learning and Iteration
It's worth noting that, as with any technology or process, there will always be room for improvements and iterations. Is there a more efficient way to filter articles? Or may a different SharePoint list structure serve you better? Always be open to revisiting and refining your setup.
Resources & Further Reading
For those hungry for more:
- Feedly's Official Blog offers updates, insights, and advanced tips to make the most of your feeds.
- Dive into Make.com's to explore other possible integrations and get inspired by other users' workflows.
- Our very own Collab365 Academy is an excellent resource for any SharePoint-related questions or advancements.
Final Words
In the world of ever-evolving tech, staying updated and efficient is crucial. By integrating Feedly with SharePoint via Make.com, you've taken a significant step in that direction. Here's to more intelligent workflows, staying informed, and leveraging technology to its fullest!
