Ever felt the thrill of discovering a gem of an article or a ground-breaking piece of news, only to lose it in the sea of browser tabs or forget to share it with your team? Imagine a world where every insightful article, every competitor update, and every piece of industry news you save gets instantly shared with your team on Microsoft Teams. Sounds like magic, right? Well, it's not magic, but it's close! Dive into this guide and unlock a seamless integration between Pocket and Microsoft Teams using the power of Make.com. By the end, you'll wonder how you ever lived without it!
5 Ideas for Integrating Pocket with Microsoft Teams
Monitoring Competitors: Instantly share and discuss competitor updates. Stay ahead and strategize in real-time.
Staying Updated with Industry News: Ensure your team is always informed. No more "Did you see this?" because everyone did!
Collaborative Research: Share resources for projects. Streamline brainstorming and ideation.
Content Curation: Effortlessly pool content for marketing campaigns, social media, or newsletters.
Knowledge Sharing and Continuous Learning: Encourage a culture of shared learning. Every article becomes a potential discussion point.
Hopefully, that's inspired you to give this a shot! This process is incredibly fast to set up:
- 2 minutes to create a Make.com account.
- 2 minutes to create a Pocket account.
- 5 minutes to create the Make scenario.
- 5 minutes to test.
Start the clock and let's get started!
1. Setting Up Pocket:
1.1. What is Pocket?
In the vast expanse of the internet, where information flows ceaselessly, Pocket emerges as a beacon for content enthusiasts. It's not just a bookmarking tool; it's a dedicated space where you can save articles, videos, and stories from any publication, page, or app, curating your own personalized reading list. Whether you stumble upon an insightful long-read during a busy workday or a tutorial you wish to revisit, Pocket ensures you never lose track. With its intuitive interface, offline reading mode, and tagging system, it transforms the way you consume content, allowing you to dive into your saved pieces whenever you wish, free from distractions. In essence, Pocket is the bridge between fleeting online discoveries and lasting knowledge.
Imagine being able to simply click a button in the browse and have it end up in Microsoft Teams!
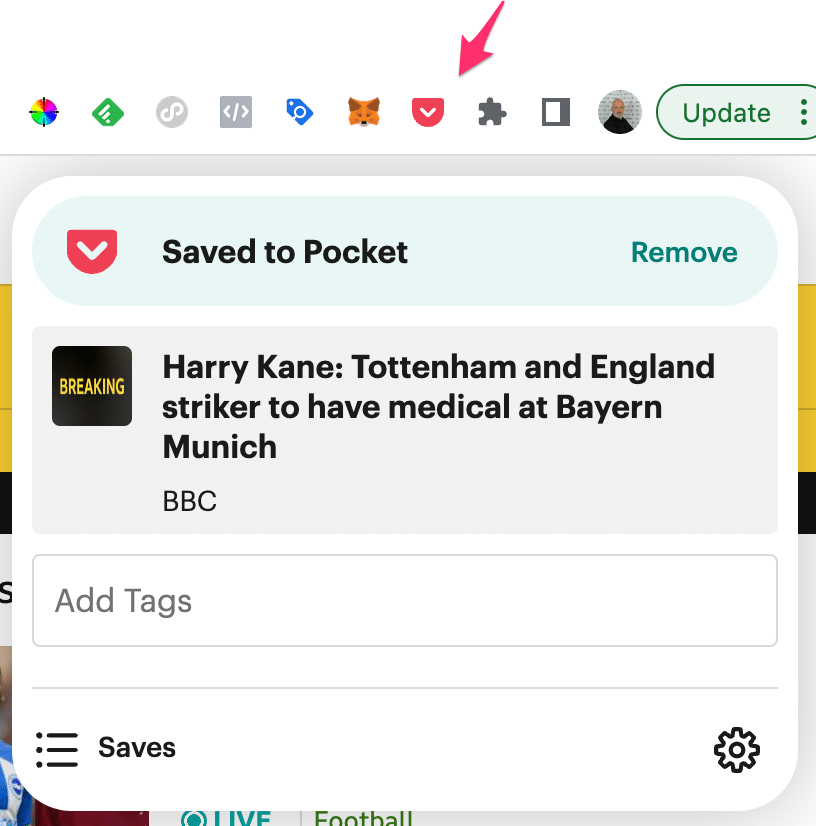
save a post to pocket
Pocket also has a handy chrome extension, which makes it really easy to save an article when you see it. Imagine, find an article that your team would love to read. All you need to do is click the browser extension and a few seconds later your brilliant article has been posted into your desired Microsoft Teams Channel!
1.2. Creating an Account:
Getting started with Pocket is straightforward. Here's a step-by-step guide:
- Navigate to the Pocket website (the free version should be fine).
- Sign up using your Google, Firefoex, Apple, or use your email address to create an account.
- Once you've signed up, install the Browser extension and you're all done!
- Surf to a web page and click the Pocket icon and you will see it says "Saved to Pocket".
2. Introduction to Make.com (formerly Integromat):
2.1. What is Make.com?
Make.com, previously known as Integromat, is a powerful online automation platform (similar to Power Automate) that connects many apps, services, and systems. Think of it as a digital go-between, seamlessly transferring data from one place to another without manual intervention. With its visual interface, users can create intricate 'scenarios' (automation workflows) by linking multiple applications, allowing them to automate tasks that would otherwise require manual input.
Its capabilities go beyond simple task automation; it can transform, filter, and process data in real time. This makes Make.com an indispensable and very affordable tool, especially when a direct connector is absent, like in Microsoft's Power Automate for our current use case.
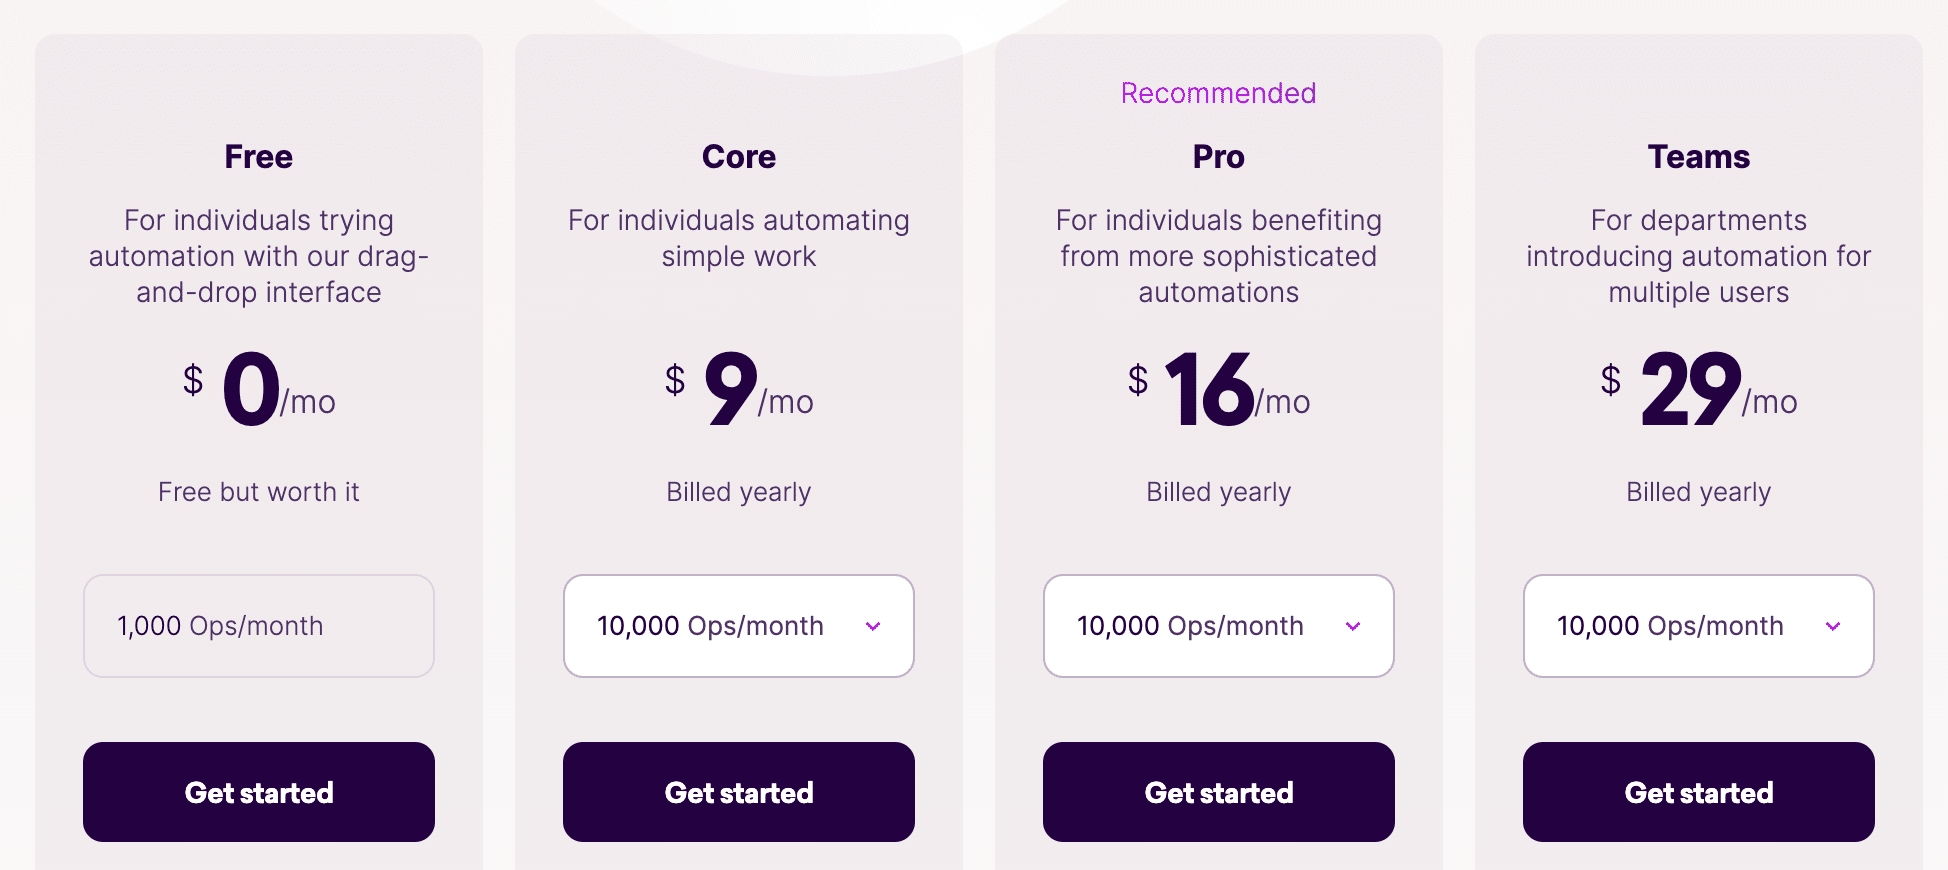
Make.com offers a free plan and also cheap. The Free Plan means you can push 500 articles into SharePoint every month!
2.2. Creating an Account:
Before we dive into creating our first scenario, let's get you signed up:
- Visit the Make.com website.
- Click on the 'Sign Up' or 'Start for Free' button, typically found at the top right.
- You'll be prompted to enter your email address and choose a password. Alternatively, you might find options to sign up using Google or other third-party accounts.
- Follow the on-screen instructions. After confirming your email, you'll be directed to your dashboard on Make.com.
- Taking a quick tour or going through the onboarding tutorial is a good idea. It provides a brief overview of the platform's features and how to navigate around.
With your Make.com account ready, the following sections will guide you on setting up a scenario to listen for saved posts in Pocket and then forwarding those to a SharePoint list.
3. Setting up Make.com to Trigger when a new article is save to Pocket:
Automating any process requires a trigger – an event that starts the flow of actions. In this context, our trigger will be saving a post to Pocket. Once that happens, we want the subsequent action to add that article into a Microsoft Teams Channel. Let's get started:
3.1. Building the Scenario:
Accessing Scenario Builder:
- Once logged in to Make.com, navigate to the dashboard.
- Click on the 'Create a new scenario' button. This will open the scenario builder, a visual workspace where you can design your workflow.
Searching for the Pocket Service:
- In the scenario builder, you'll find a search bar labelled 'Search for apps...'. Type in "Pocket" and select it from the dropdown.
Selecting Pocket as the Trigger Service:
- Once you've added Pocket, you'll be asked to choose a trigger. Select "Watch Posts". This is a scheduled trigger so by default means that Make will poll Pocket every 15-minutes. You can lower this to 1-minute by converting to one of their paid plans.
3.2. Configuring the Pocket Trigger:
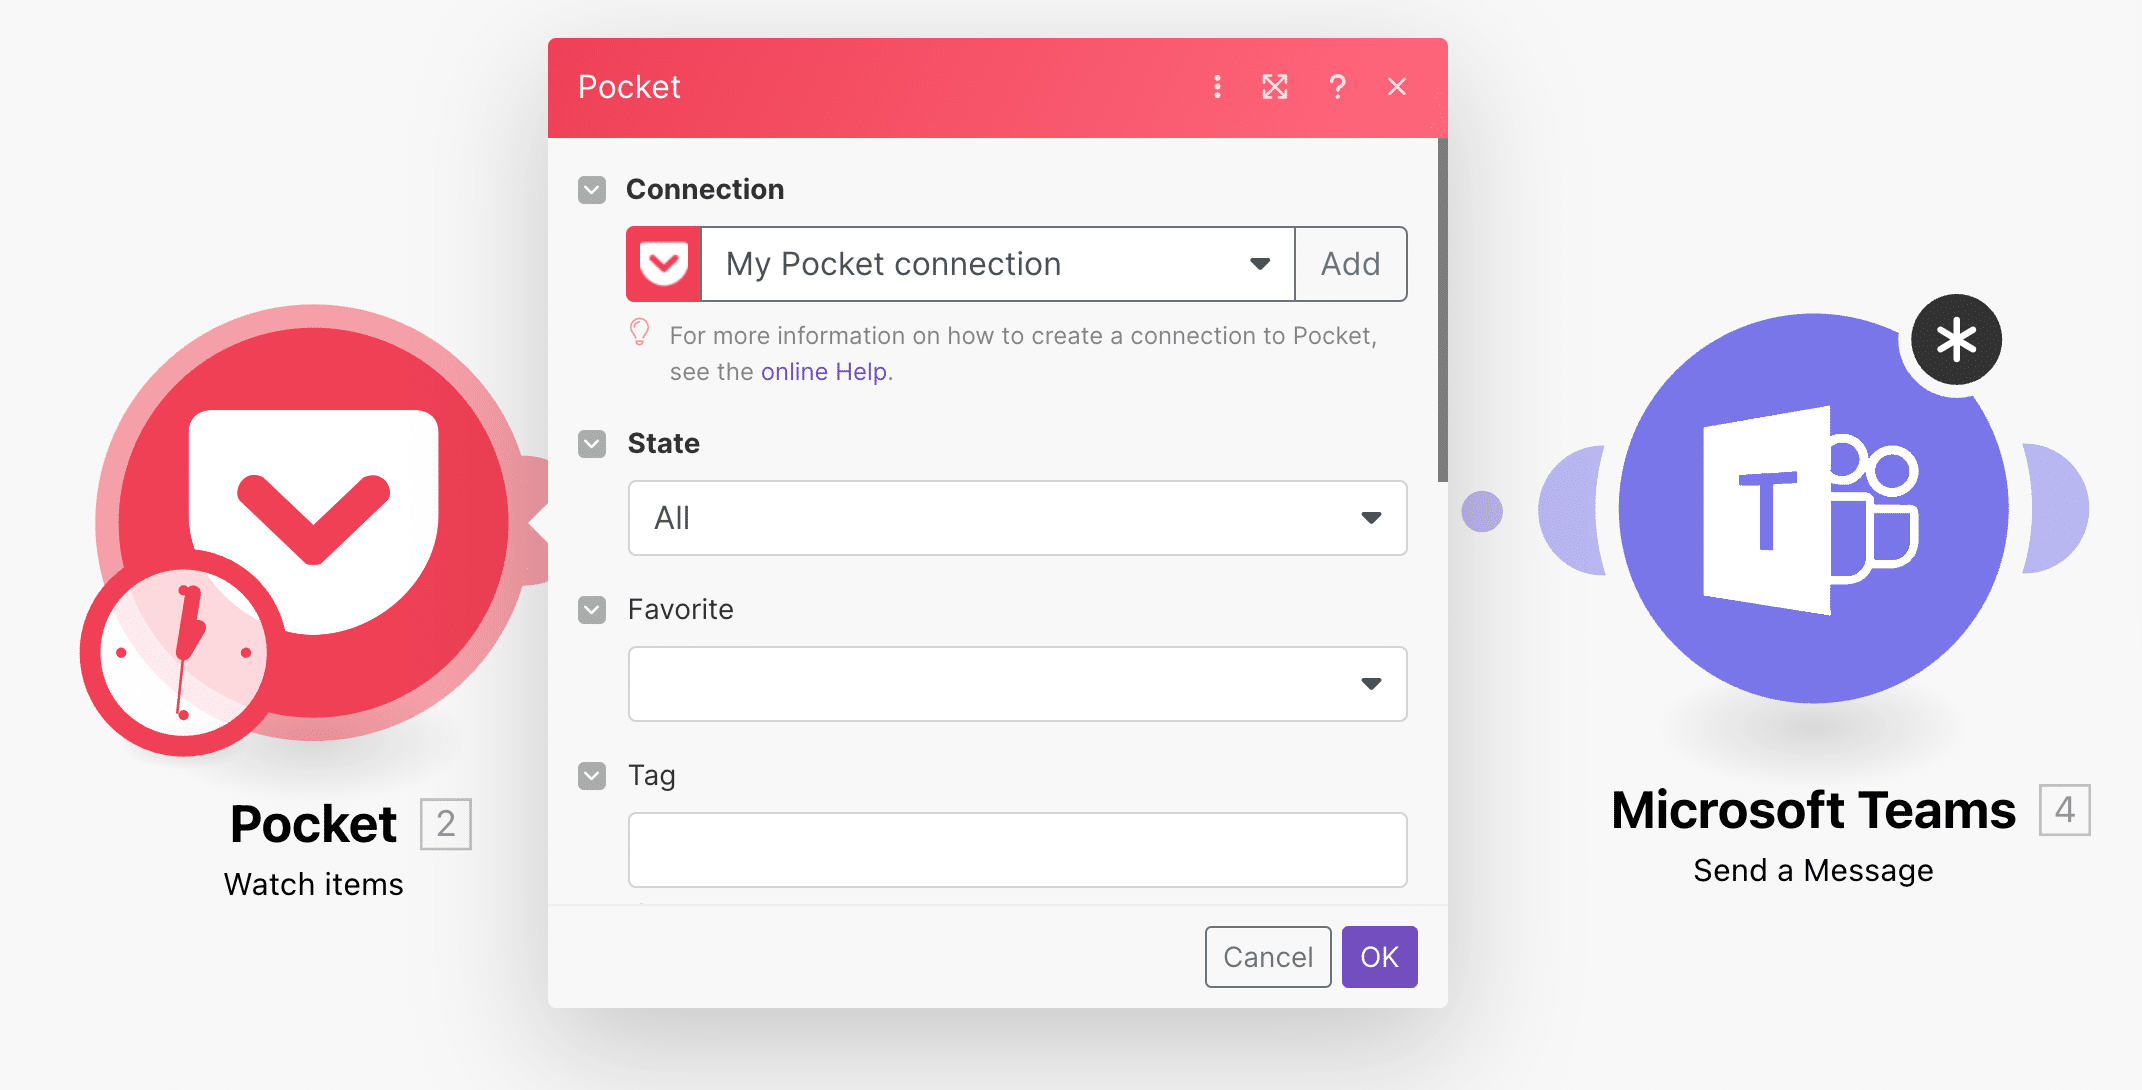
configure the pocket module in make
Granting Access:
- You'll need to connect the two services to allow Make.com to listen for events in your Pocket account.
- Click on the Pocket module you added. A window will pop up, prompting you to sign in to your Pocket account. Proceed and grant the necessary permissions.
Configuring the Trigger:
- Once connected, you'll need to specify which posts Make.com should monitor. Leave everything as default (empty), but it's worth noting that you can filter the posts to push to Teams based on Tag, Favourites, Domain and State.
- Adjust any additional settings as needed.
Finalising the Setup:
- Once everything is configured, click 'OK' or the confirmation button to finalise this part of the setup.
Your Pocket trigger is now set! Whenever you save a post to Pocket your, Make.com will be pick it up on the next schedule. The next step, section 4, will detail how to send this data to Microsoft Teams Channel.
4. Integrating Teams with Make.com:
Now that you have Make.com poised to detect when you save a post in Pocket, it's time to channel this trigger into a tangible action: sending this data to your Teams Channel. Let's walk through the process:
4.1. Adding Microsoft Teams as an Action:
Accessing Scenario Builder in Make.com:
- If you still need to get there, navigate to the scenario builder where you set up the Pocket trigger.
Searching for the Microsoft Teams Service:
- In the scenario builder, look for the '+' icon (usually, it appears to the right of the Pocket module). Click it, then search for "Microsoft Teams" in the service search bar and select it from the dropdown.
Choosing Microsoft Teams Action:
- You'll be asked to select an action. For our purpose, choose the "Send a Message" option or a similar option that indicates creating a new message in a Teams Channel.
4.2. Configuring the Microsoft Teams Action:
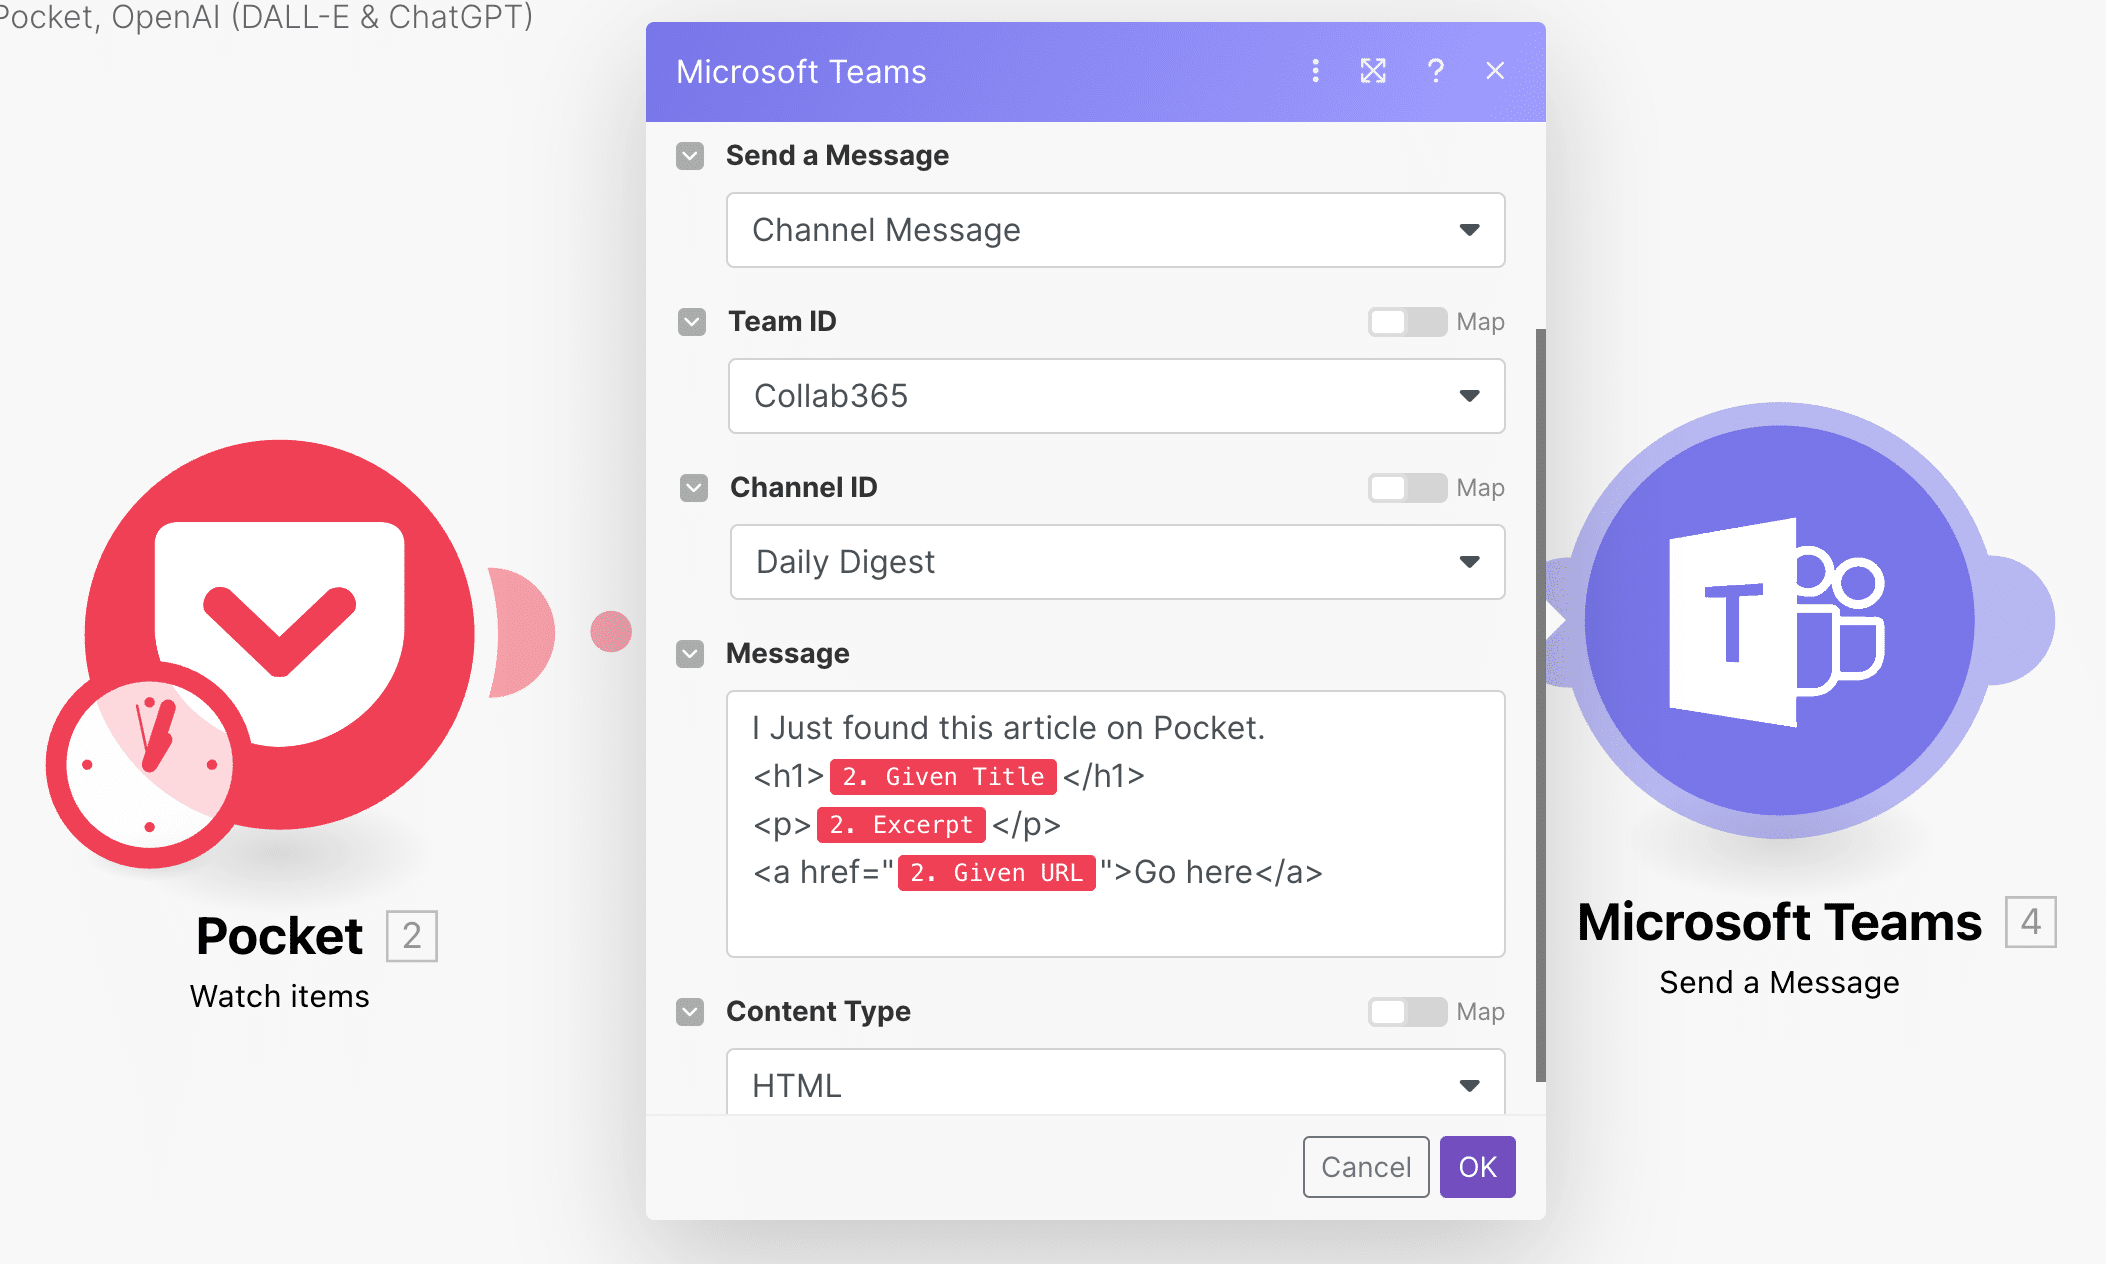
configure the microsoft teams module in make
Connecting to Microsoft Teams:
Click on the Microsoft Teams module you've added. A window will pop up, prompting you to connect to your Microsoft Teams account. Input the necessary credentials and grant permissions for Make.com to interact with your Microsoft Teams.
Specifying Microsoft Teams Details:
You'll need to provide specific details to direct where the articles should be saved.
- Send a Message Type: Select "Channel Message".
- Teams ID: Select or input the Team name name you wish to save the posts to.
- Channel ID: Select or input the Channel name (in the Team) you wish to save the posts to.
- Content Type: Choose HTML
- Message: See Below:
I Just found this article on Pocket.
<h1>{{2.given_title}}</h1>
<p>{{2.excerpt}}</p>
<a href="{{2.given_url}}">Go here</a>
Your final scenario should look like this:
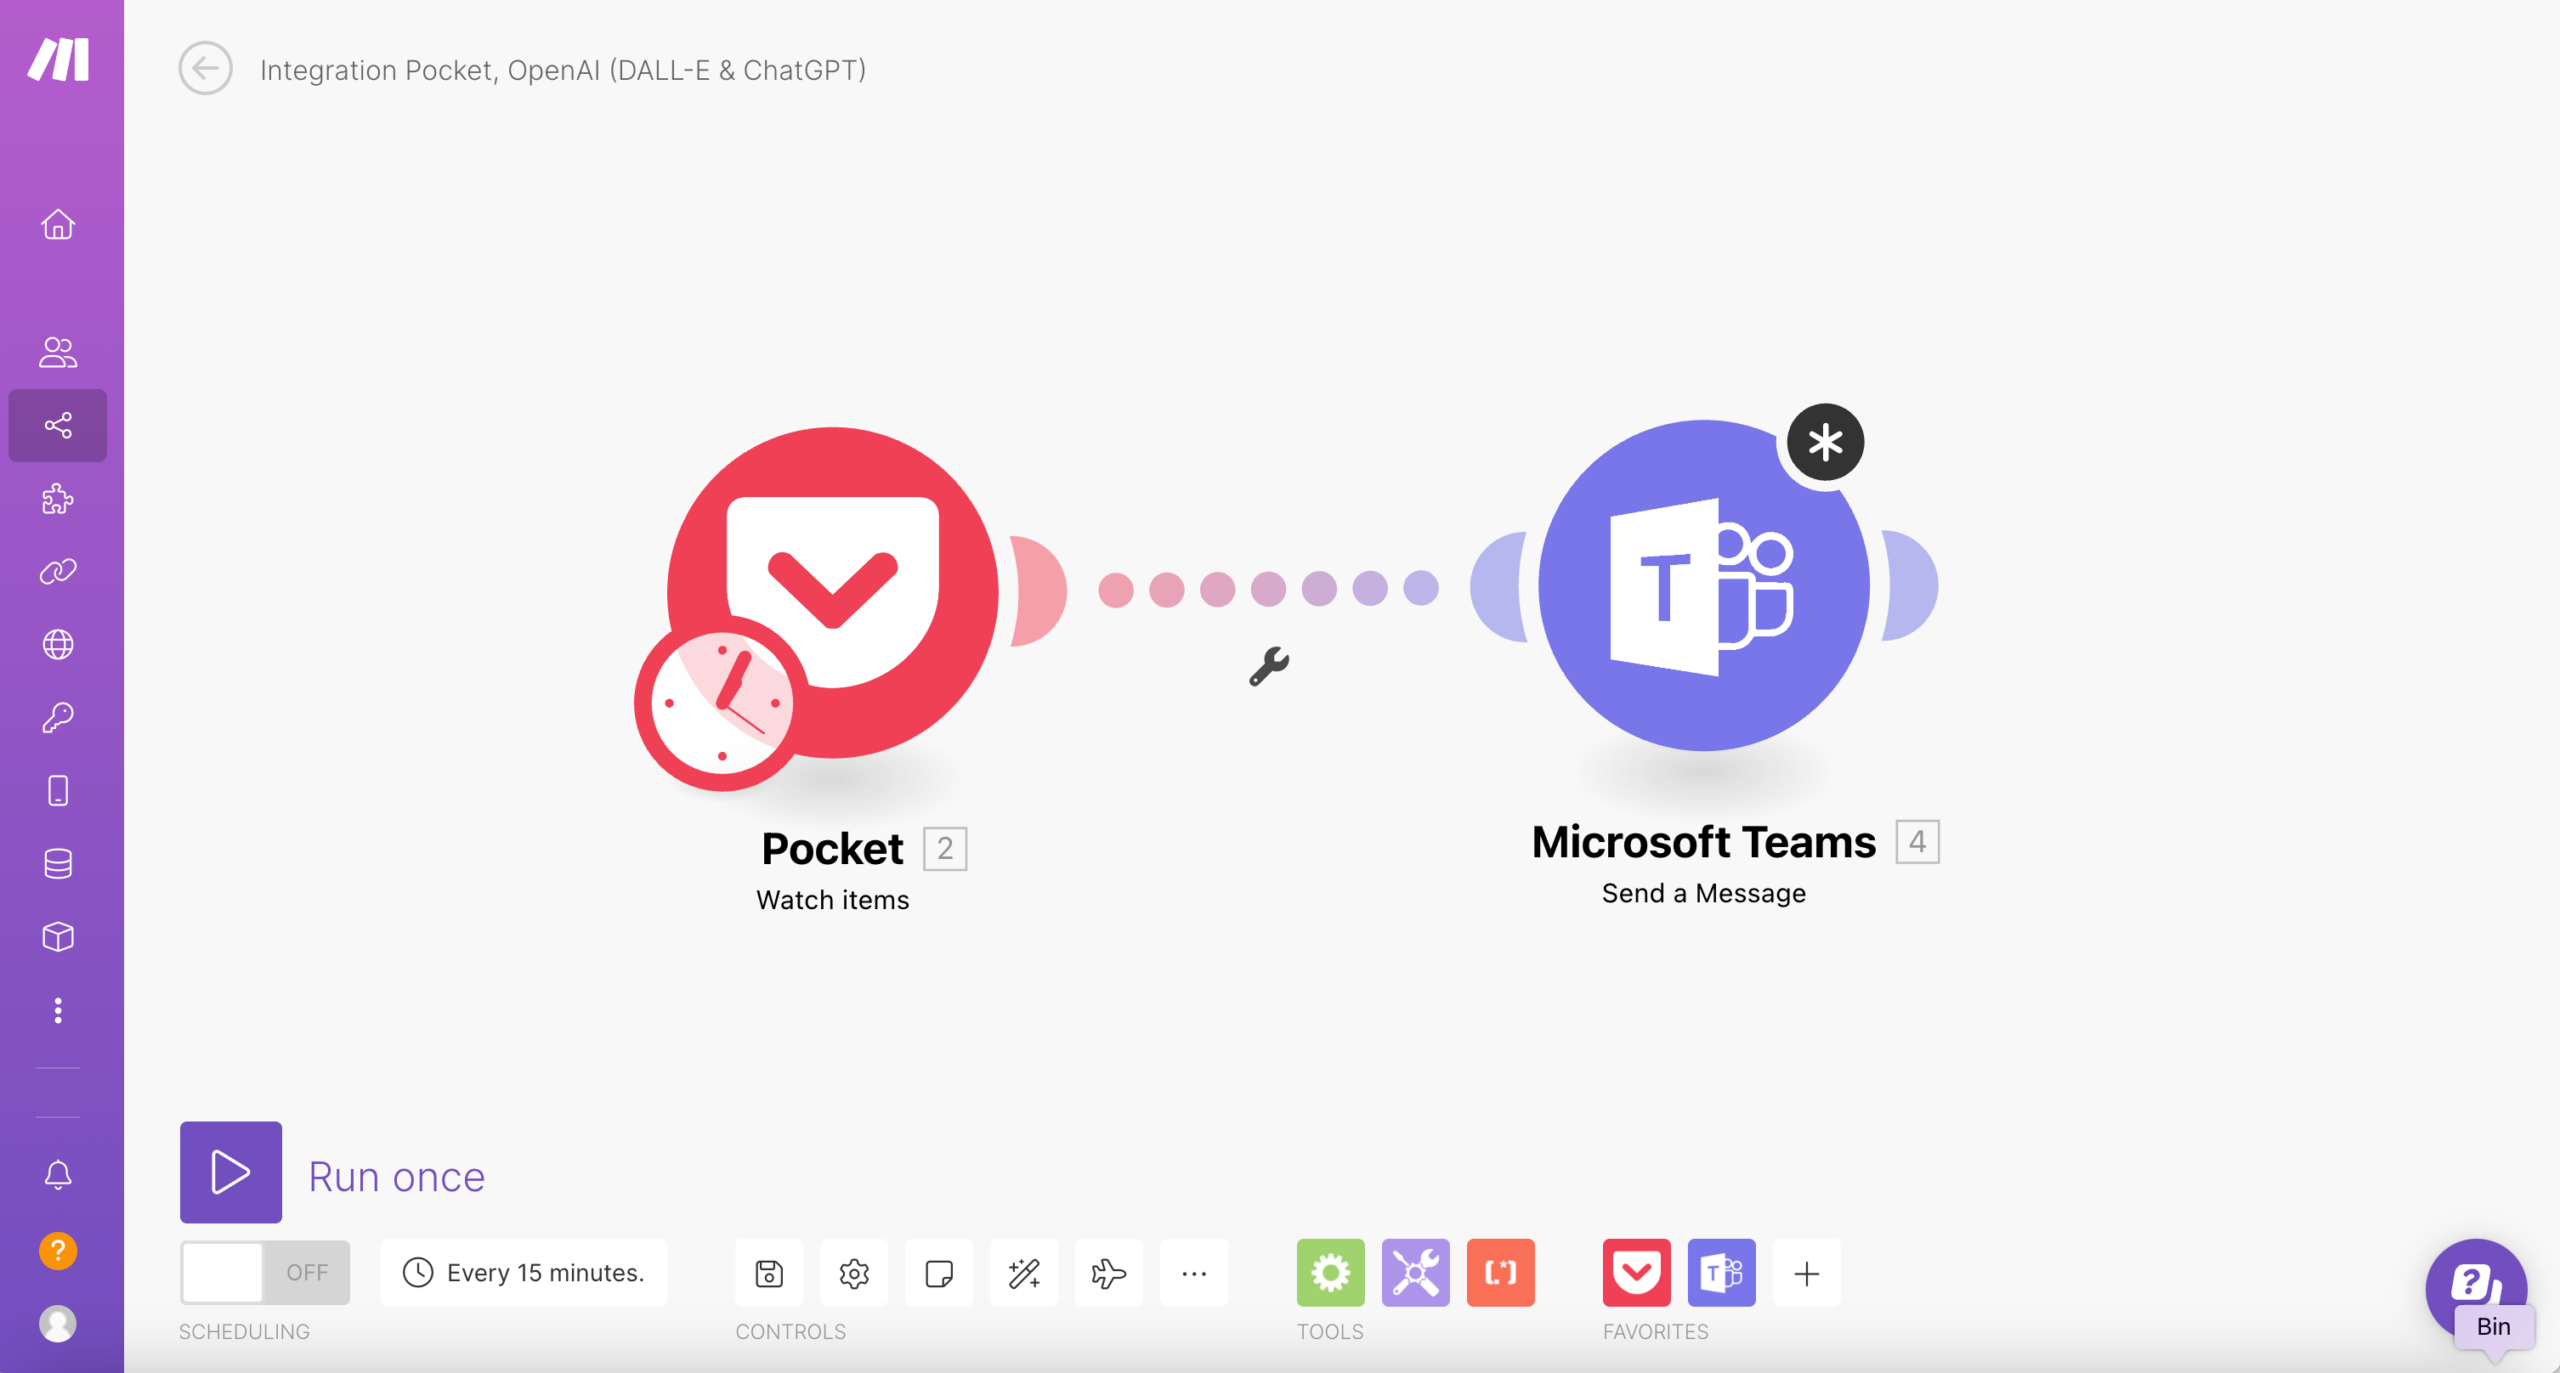
pocket to teams scenario in make
4.3. Error Handling and Logging:
Automation isn't foolproof. There might be instances when data might not sync correctly, or some other error might crop up. Here's how to keep track:
Adding an Error Handler:
- In Make.com's scenario builder, look for the option to add an error handler (typically represented as an exclamation mark or similar icon). Attach this to the SharePoint module.
Setting up Notifications or Logs:
- Configure the error handler to send you an email notification or to log the error in a specific location whenever there's an issue during the synchronization process.
- Consider creating a separate SharePoint list or another logging method to keep a record of any hiccups in the system.
5. Testing the Workflow:
After diligently setting up the automation flow, testing the end-to-end process is essential to ensure that everything functions as anticipated. This step is crucial, confirming that your setup is foolproof and ready for practical use. Let's walk through this phase:
5.1. Save a Post in Pocket:
Simply browse to an interesting article (maybe this one), click the Pocket Icon and you should see a message in Teams.
5.2. Verifying in Teams:
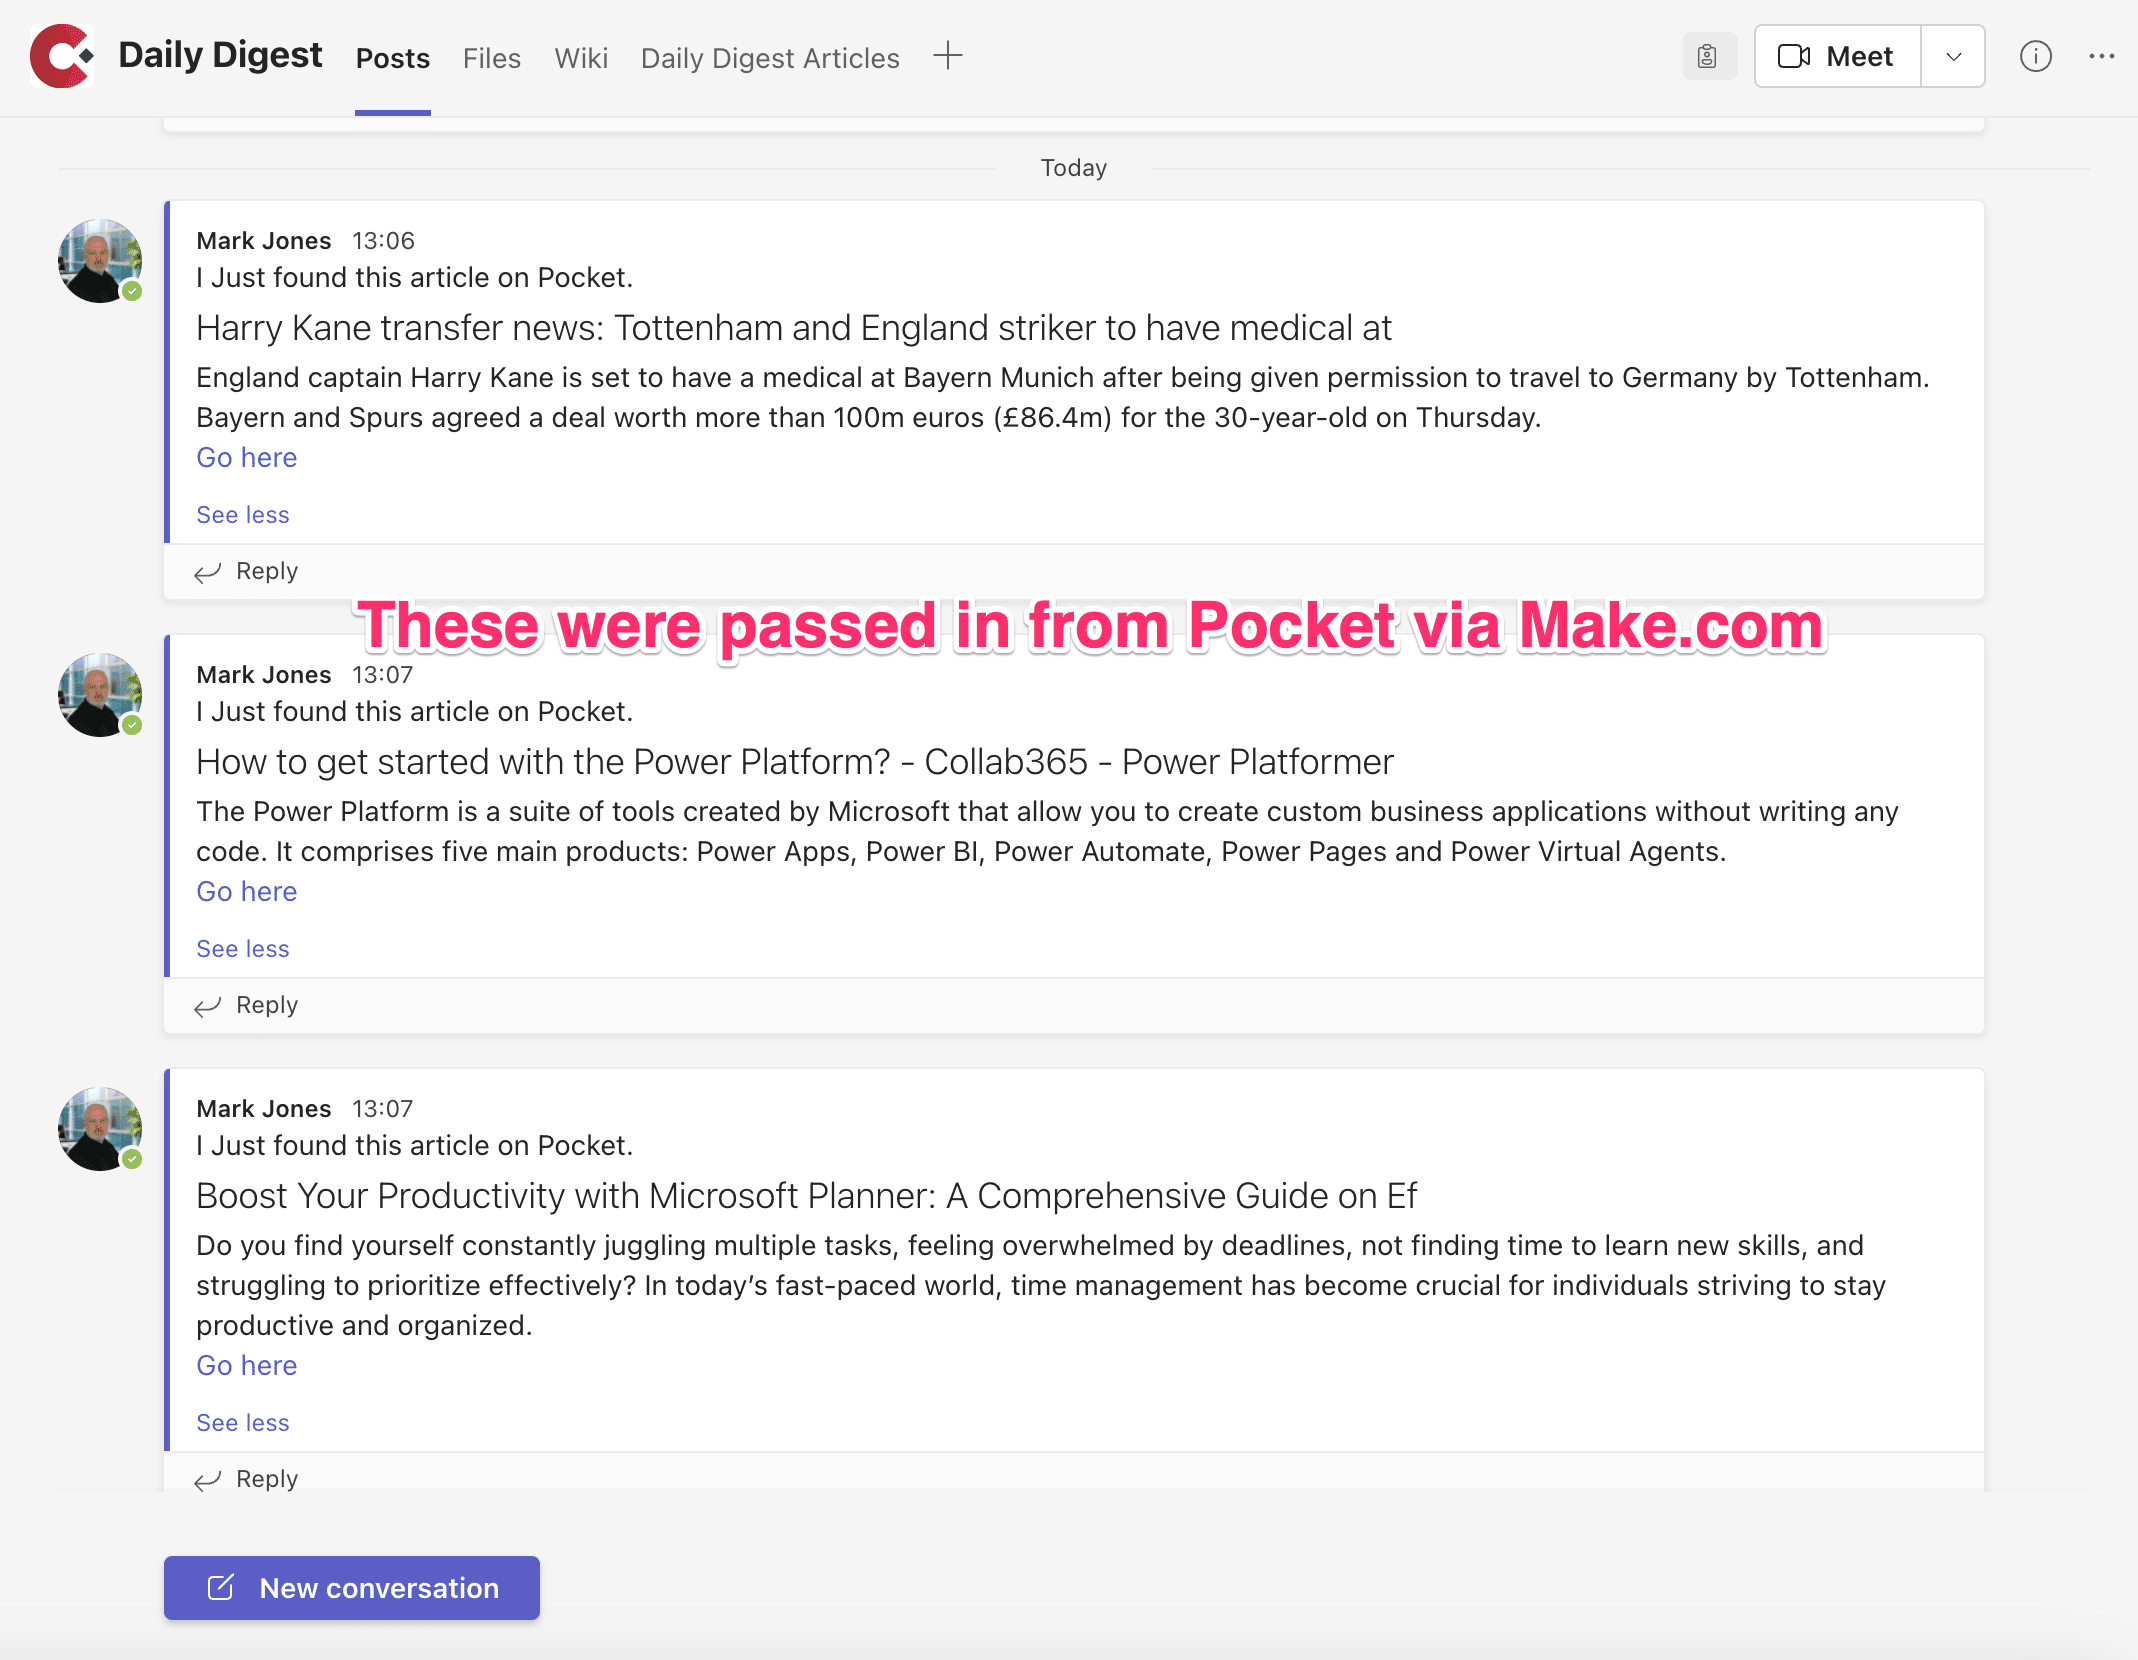
microsoft teams displaying messages from pocket
Allow for Some Processing Time:
- After saving the article in Pocket, wait for a few minutes. The duration depends on the frequency of Make.com's checks, which might vary based on your settings or plan.
Goto your Teams Channel:
- Navigate to the Teams Channel where you've configured the posts to be saved.
Checking for the New Entry:
- You should see a new entry corresponding to the article you just saved in Pocket. Ensure that all details, like the title, link, and summary, are accurately captured.
Troubleshooting (if necessary):
If you don't see the article reflected in your Microsoft Teams:
- Check the error logs or notifications you've set up on Make.com.
- Ensure that the Pocket account you save articles to is configured in Make.com.
- Double-check your mapping configurations in Make.com to ensure that all fields match correctly.
Congratulations! If your test posts appears in the Microsoft Teams, your integration has been successfully set up. This means you've now unlocked the ability to automate the transfer of posts from Pocket directly into Teams, saving you time and ensuring that relevant information is always at your fingertips. In the next section, we'll wrap things up and explore the broader potential of this automation.
6. Concluding Thoughts:
As we conclude our guide, we must reflect on the journey and acknowledge the power and efficiency automation brings to our daily tasks.
Automation and Integration: The Dynamic Duo
At the heart of this guide lies the concept of integration and automation. The union of Pocket and Make.com channelled into Teams, isn't just a demonstration of the technology. It's about making information more accessible, organized and ensuring we stay updated without manually checking or updating lists. In a digital age where information is abundant, such automation ensures that we remain efficient, organized, and always a step ahead.
Exploring Beyond the Horizon
What we've covered is just the tip of the iceberg. Both Make.com and Pocket offer a plethora of other features and integrations. Would you like notifications for particular types of articles? Or automatically sharing certain articles on your corporate intranet or social media platforms? The possibilities are almost endless, and by diving deeper into the capabilities of both platforms, you can craft workflows tailored precisely to your needs.
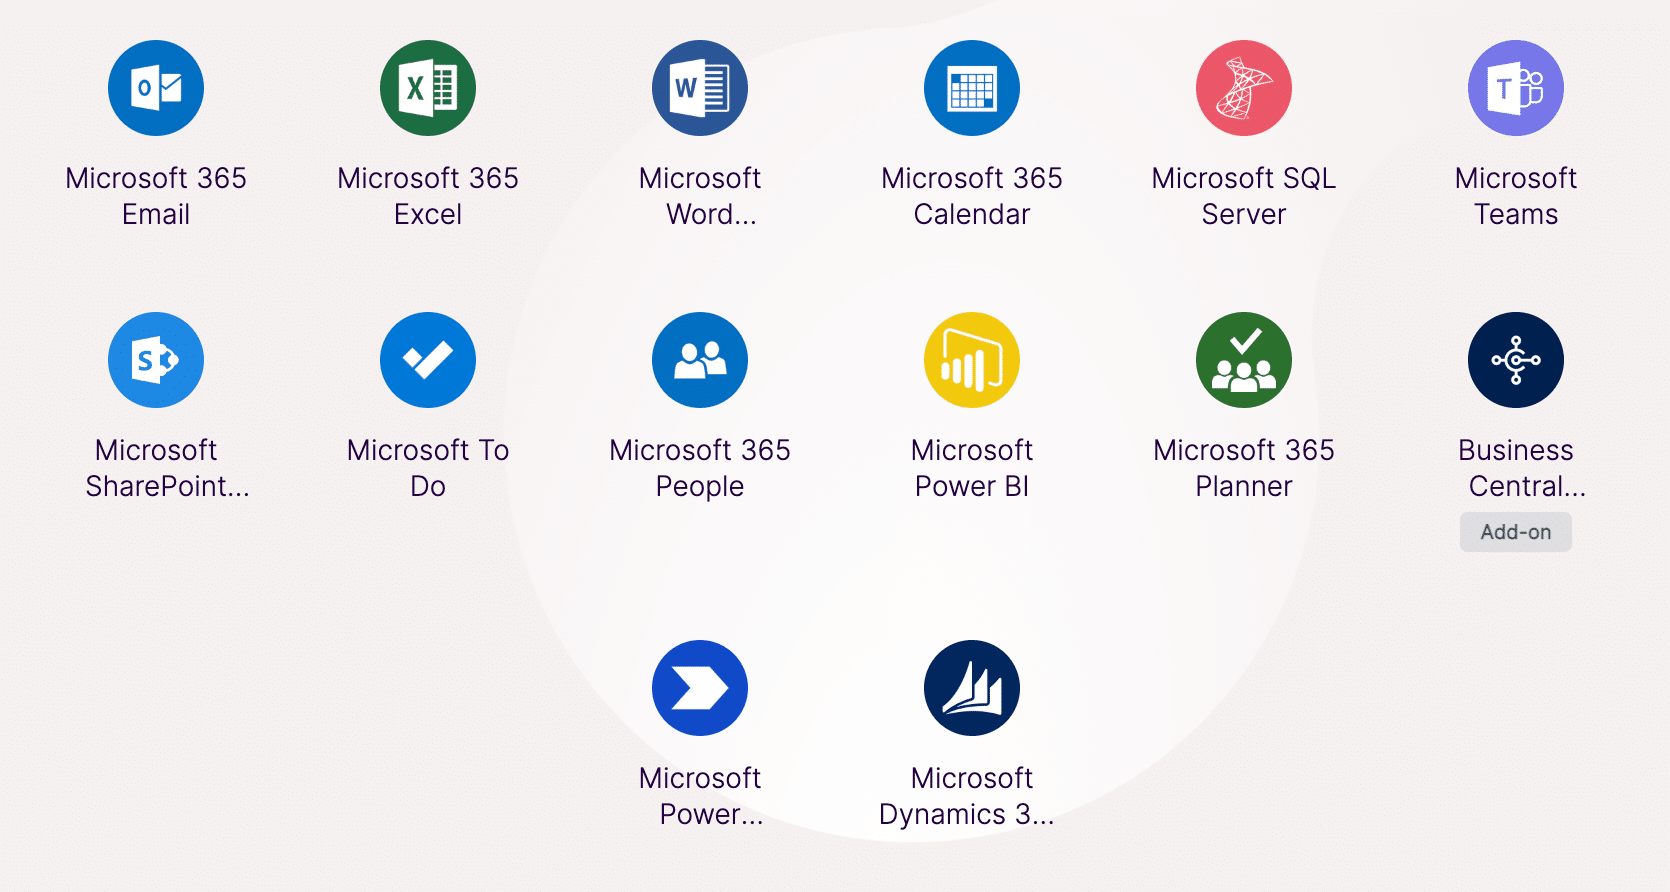
The example we showed in this tutorial illustrated how easy (and cheap) it was to push an article into SharePoint. You could easily change that to push an article into a SharePoint List or Chat Message. Perhaps you'd like it in Excel or Planner? The World is your oyster!
Continuous Learning and Iteration
It's worth noting that, as with any technology or process, there will always be room for improvements and iterations. Is there a more efficient way to filter articles? Or may a different SharePoint list structure serve you better? Always be open to revisiting and refining your setup.
Resources & Further Reading
For those hungry for more:
- Dive into Make.com's to explore other possible integrations and get inspired by other users' workflows.
- Our very own Collab365 Academy is an excellent resource for any SharePoint-related questions or advancements.
Final Words
In the world of ever-evolving tech, staying updated and efficient is crucial. By integrating Pocket with Microsoft Teams via Make.com, you've taken a significant step in that direction. Here's to more intelligent workflows, staying informed, and leveraging technology to its fullest!
