Manually creating similar images over and over takes so much time. But what if you could instantly generate customised images from templates based on SharePoint list data?
With RenderForm and Make.com, you can set up automated workflows using dynamic data to render images on the fly. This saves tons of time and unlocks new possibilities for personalised visuals.
In this post, I'll walk step-by-step through connecting RenderForm and Make to auto-generate images from SharePoint list items. Follow along to see how easy it is!
Use Case: Create Custom Images for your social posts
Let's look at a real example: a business wanting to create custom social post images daily, which needs to be fast! Doing this manually in graphics packages like Photoshop is time consuming and laborious.
With RenderForm and Make, the images can be created automatically!
Here's how it works...
Step 1: Create a SharePoint List
- First, create a custom SharePoint list to hold the data.
- Log in to your SharePoint site and click on Lists in the left sidebar.
- Click New, and select Microsoft List.
- Name your list something like "Social Posts".
- Add these 3 text columns:
- Title
- Quote
- Image URL
- The Title and Quote will be entered into the list by the social media manager. The Image URL will be a link to the newly generated image file (returned back from RenderForm).
Step 2: Build a Template in RenderForm
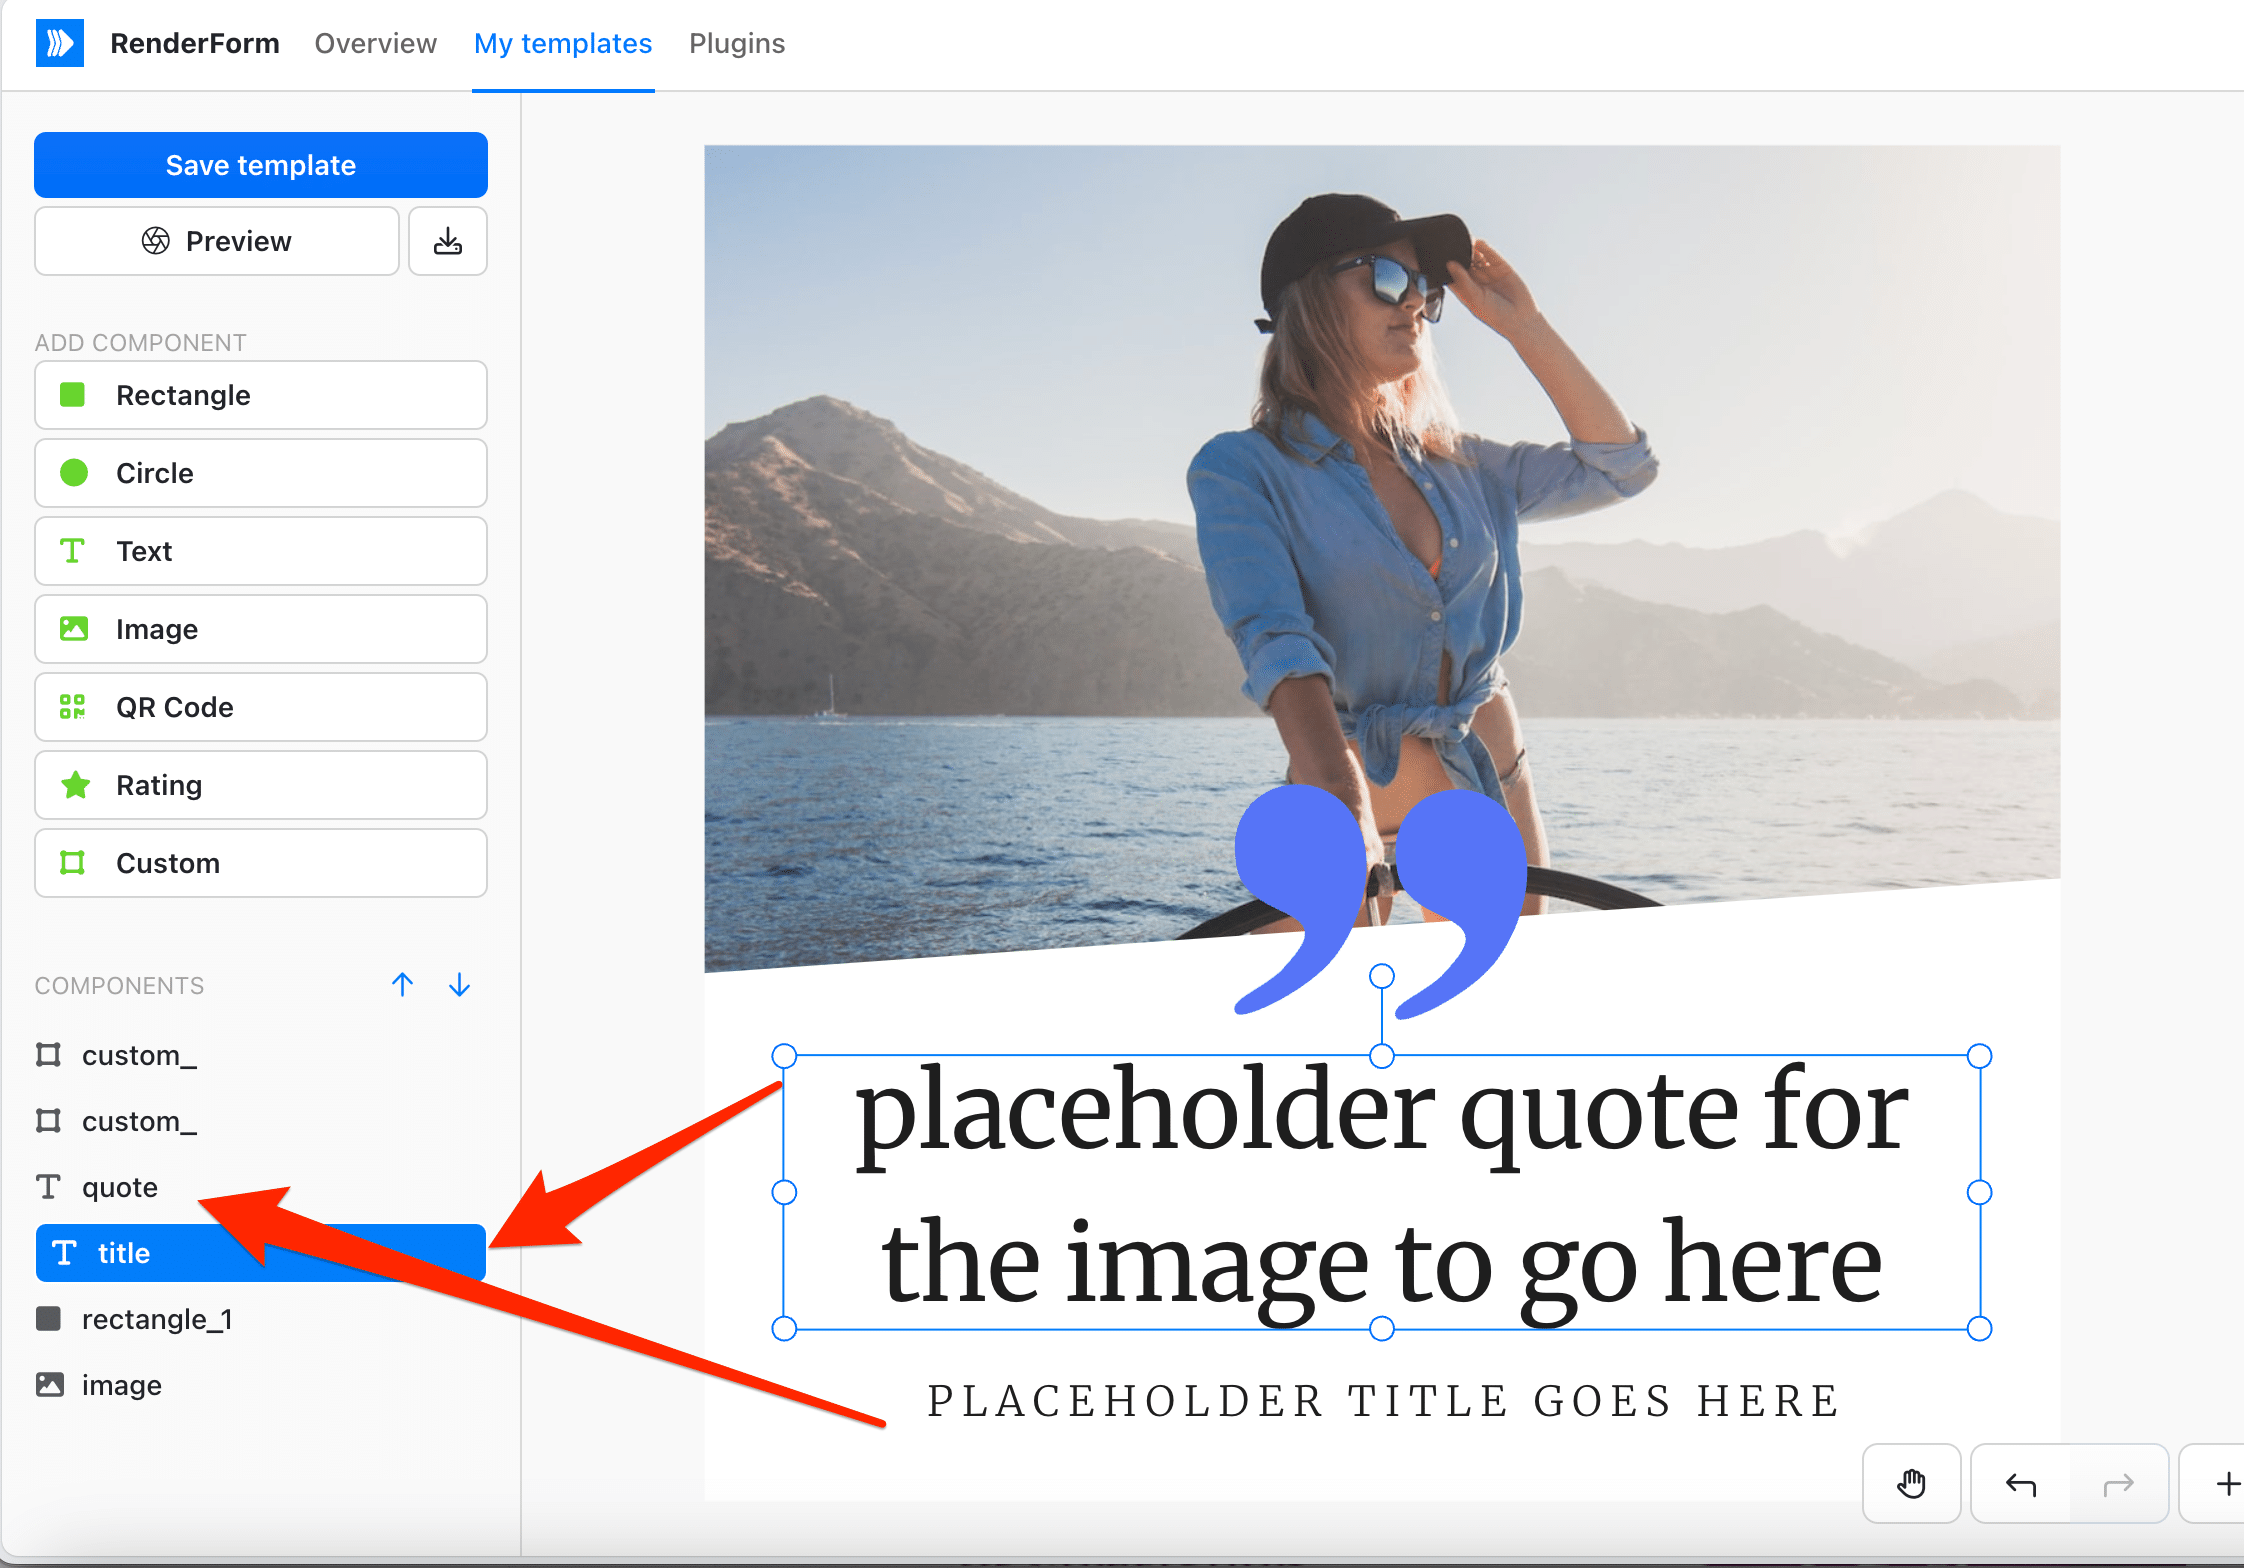
Now we need to head over to RenderForm because we want to create our Template Images. In the example below, our goal is to create two text boxes ("Title" and "Quote") which will be replaced by what a person types into the SharePoint List.
Tip: Think of this process a little bit like a "Mail Merge", where the word document is an image.

Create a new template in Renderform and add Quote and Title Placeholders
- Next, build the image template in RenderForm.
- Go to RenderForm.com and create a free account if you don't have one.
- In the Editor, design your template. For a product image, add:
- A background image.
- A text box for the "Title" Placeholder.
- A text box for the "Quote" Placeholder.
- A little quote symbol for some extra pizazz!
- One you're happy with your new Quote image template save it and and remember what you named it.
Step 4: Create the Scenario in Make that connects SharePoint (data) to RenderForm (image)
Unfortunately, SharePoint (or Power Automate) aren't directly integrated with RenderForm, but fear not, it's really easy to use one of my favourite automaton tools called "Make".
To set up the process in Make you need to add a new "Scenario" (think "Power Automate Flow") that automates image generation when a new list item is added. We will now use Make to "Watch" for new list item being added to our desired list. When a new list item is created Make will be triggered and it will extract the "Title", and "Quote" just entered (into the list) and then connect to RenderForm and pass that to the template. Once Renderform is done, we will pass the newly created image url back into SharePoint.
- If you don't already have a free account in Make, get one here.
- Log-in to Make, and click Scenarios and "Create a new scenario".
- On the Scenario canvas, click "+" and find the "SharePoint Online" Module and choose "Watch Items".
- If this is your first time, follow the instructions to create a new connection to your tenant.
- Then you need to find your Site ID (where you created your list in "Step 1") using "ID Finder", for example, this is mine: *******.sharepoint.com,0e1aba81-4eee-45fe-a8e0-de06271edd56,013e138f-b93e-4b01-9017-f76afe0b8b47
- Once you have added your site, pick select your "Social Posts" List.
- Now add a RenderForm module and choose "Render an image".
- Connect it your your RenderForm account by pasting in your API key (which is available in your RenderForm account).
- Configure it to:
- Map list columns to template elements
- Generate the image
- Output the image URL to the SharePoint list
- Turn on the scenario. It's now automated!

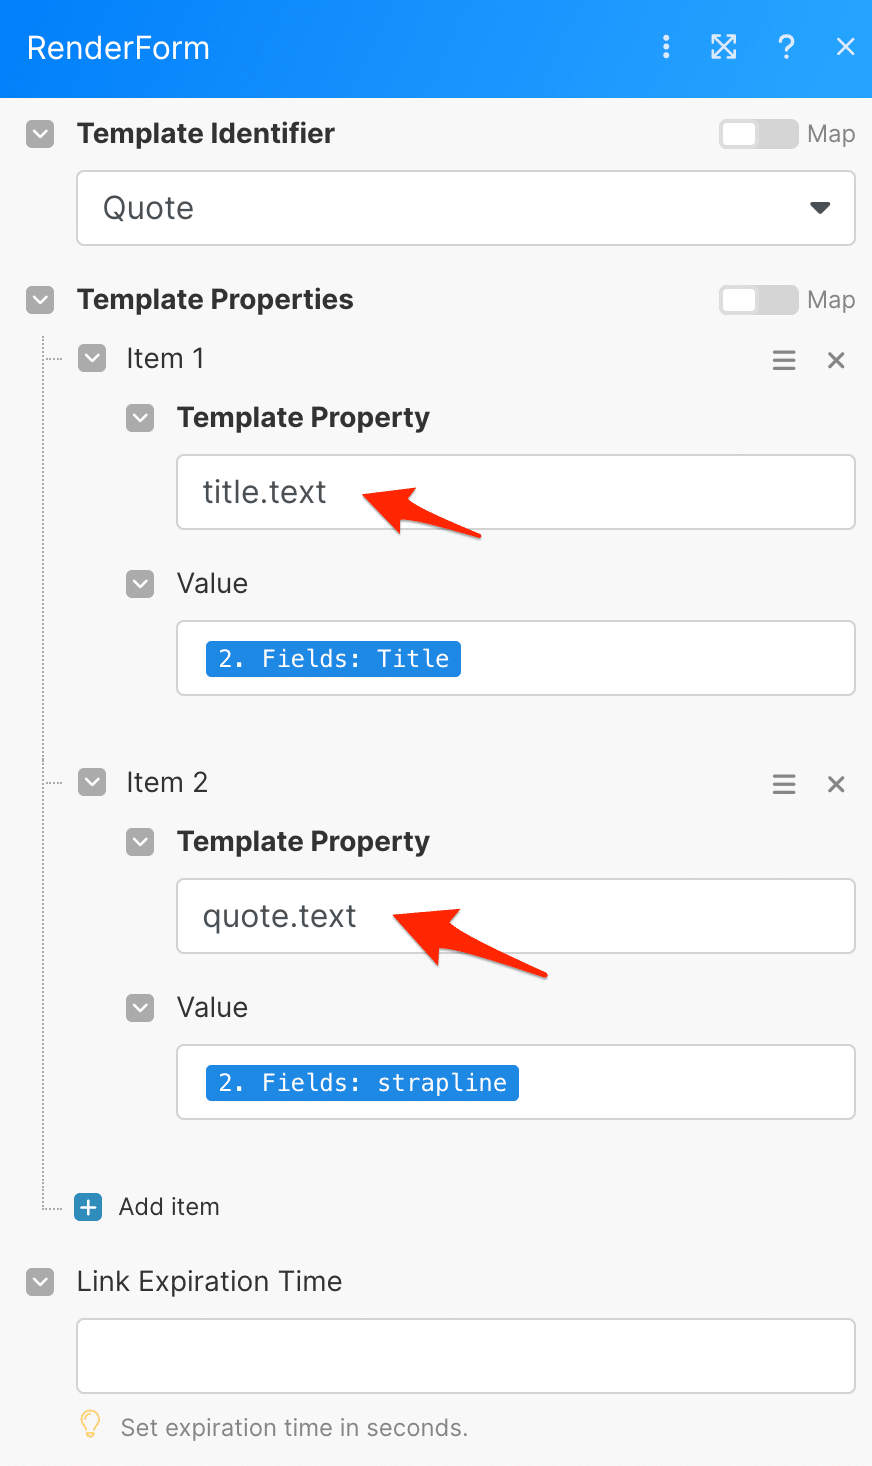
how to pass the values to renderform
You can see from the example, that to dynamically pass the values into Render you must pull them from the Fields generated by the previous SharePoint Module.
Please note: In my example, it says "2. Fields: strapline", but in yours you should be able to pick "2. Fields: quote".
Please make sure you refer to your Template Property fields with "[name].text". See screenshot.
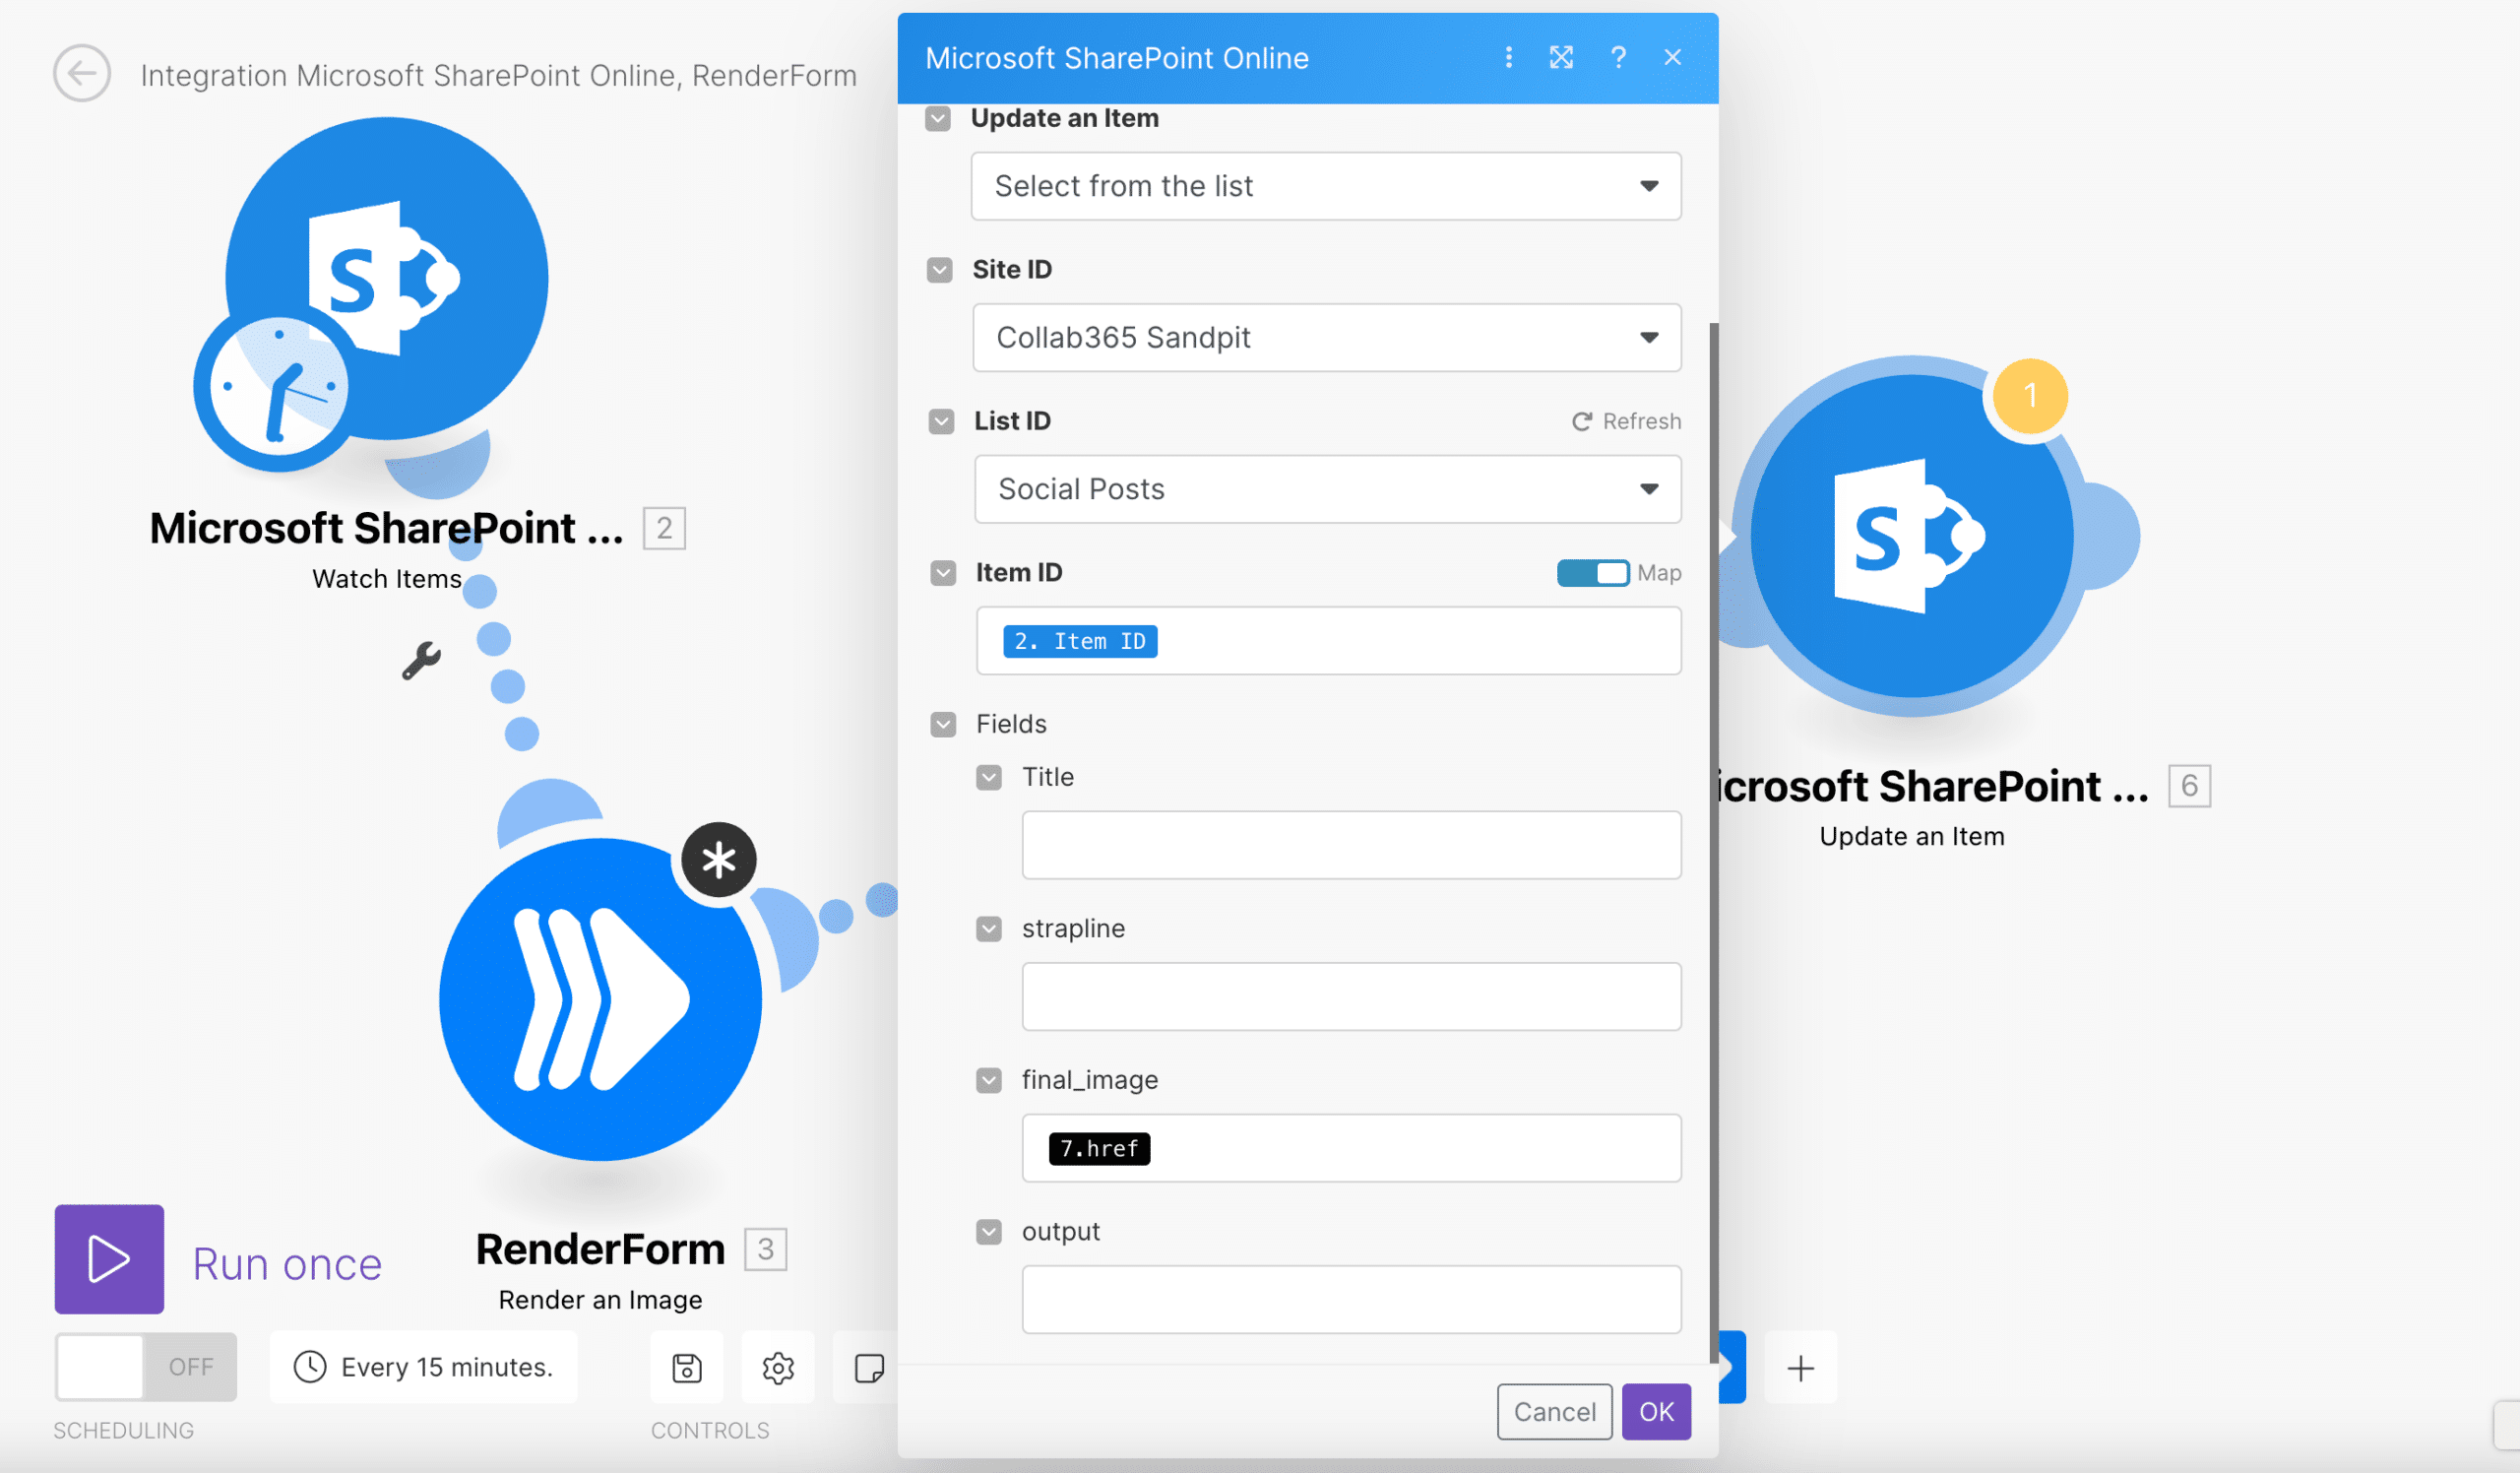
Now, Add another SharePoint Module and connect it to the Renderform module.
Choose "Update an Item"
Now set the properties on your new SharePoint Module. Your final scenario (with the properties for "Update an Item" should look like this:

the final scenario
Step 4: See it in Action!
With the automation set up, let's test it.
- Add a new item to the SharePoint list with a "Title" and "Quote".
- Click "Run Once" and the Make scenario will kick off and grab your latest list item.
- RenderForm generates the image using the template and data.
- The image URL gets saved back to the SharePoint item.
- Copy the image from that SharePoint List Item and paste it into a browser.
- You should now have a brand new image that has the same quote that you entered into the SharePoint List Item?
- Did it work? Need help? Join the Collab365 Academy. (We hang out all day in there).

Step 5: Use Cases
Now that you can see how easy this process is, I am sure you will be thinking "Where would I use this?", so how about these ideas for inspiration:
Step 6: Find the plan to suit you!
RenderForm and Make both offer free and affordable paid plans. Here are a couple of examples:
Completely FREE Plan: This will allow you to create 50 Free images.
RenderForm
$0
Make.com
$0
These plans will allow you to create 1000 images / month:
RenderForm (Pro)
$19
Make.com (Core)
$9
To put this into perspective, if members of your team were manually creating 100 unique images per month at $50/hour, it could cost $5000. The automation saves 98% of costs.
Step 8: Support Us!
At Collab365, we use both RenderForm and Make.com and highly recommend them. If you found this tutorial helpful, please consider signing up for RenderForm and Make via our special affiliate links:
It helps us continue creating content like this. If you do, thanks for your support!
If you'd like to this discuss this further why not sign up for a free account in the Collab365 Academy and start a discussion?
